How to set up Gmail forwarding
Forward your Rightmove, Zoopla and OnTheMarket enquiry emails to Callisto so leads are called automatically.
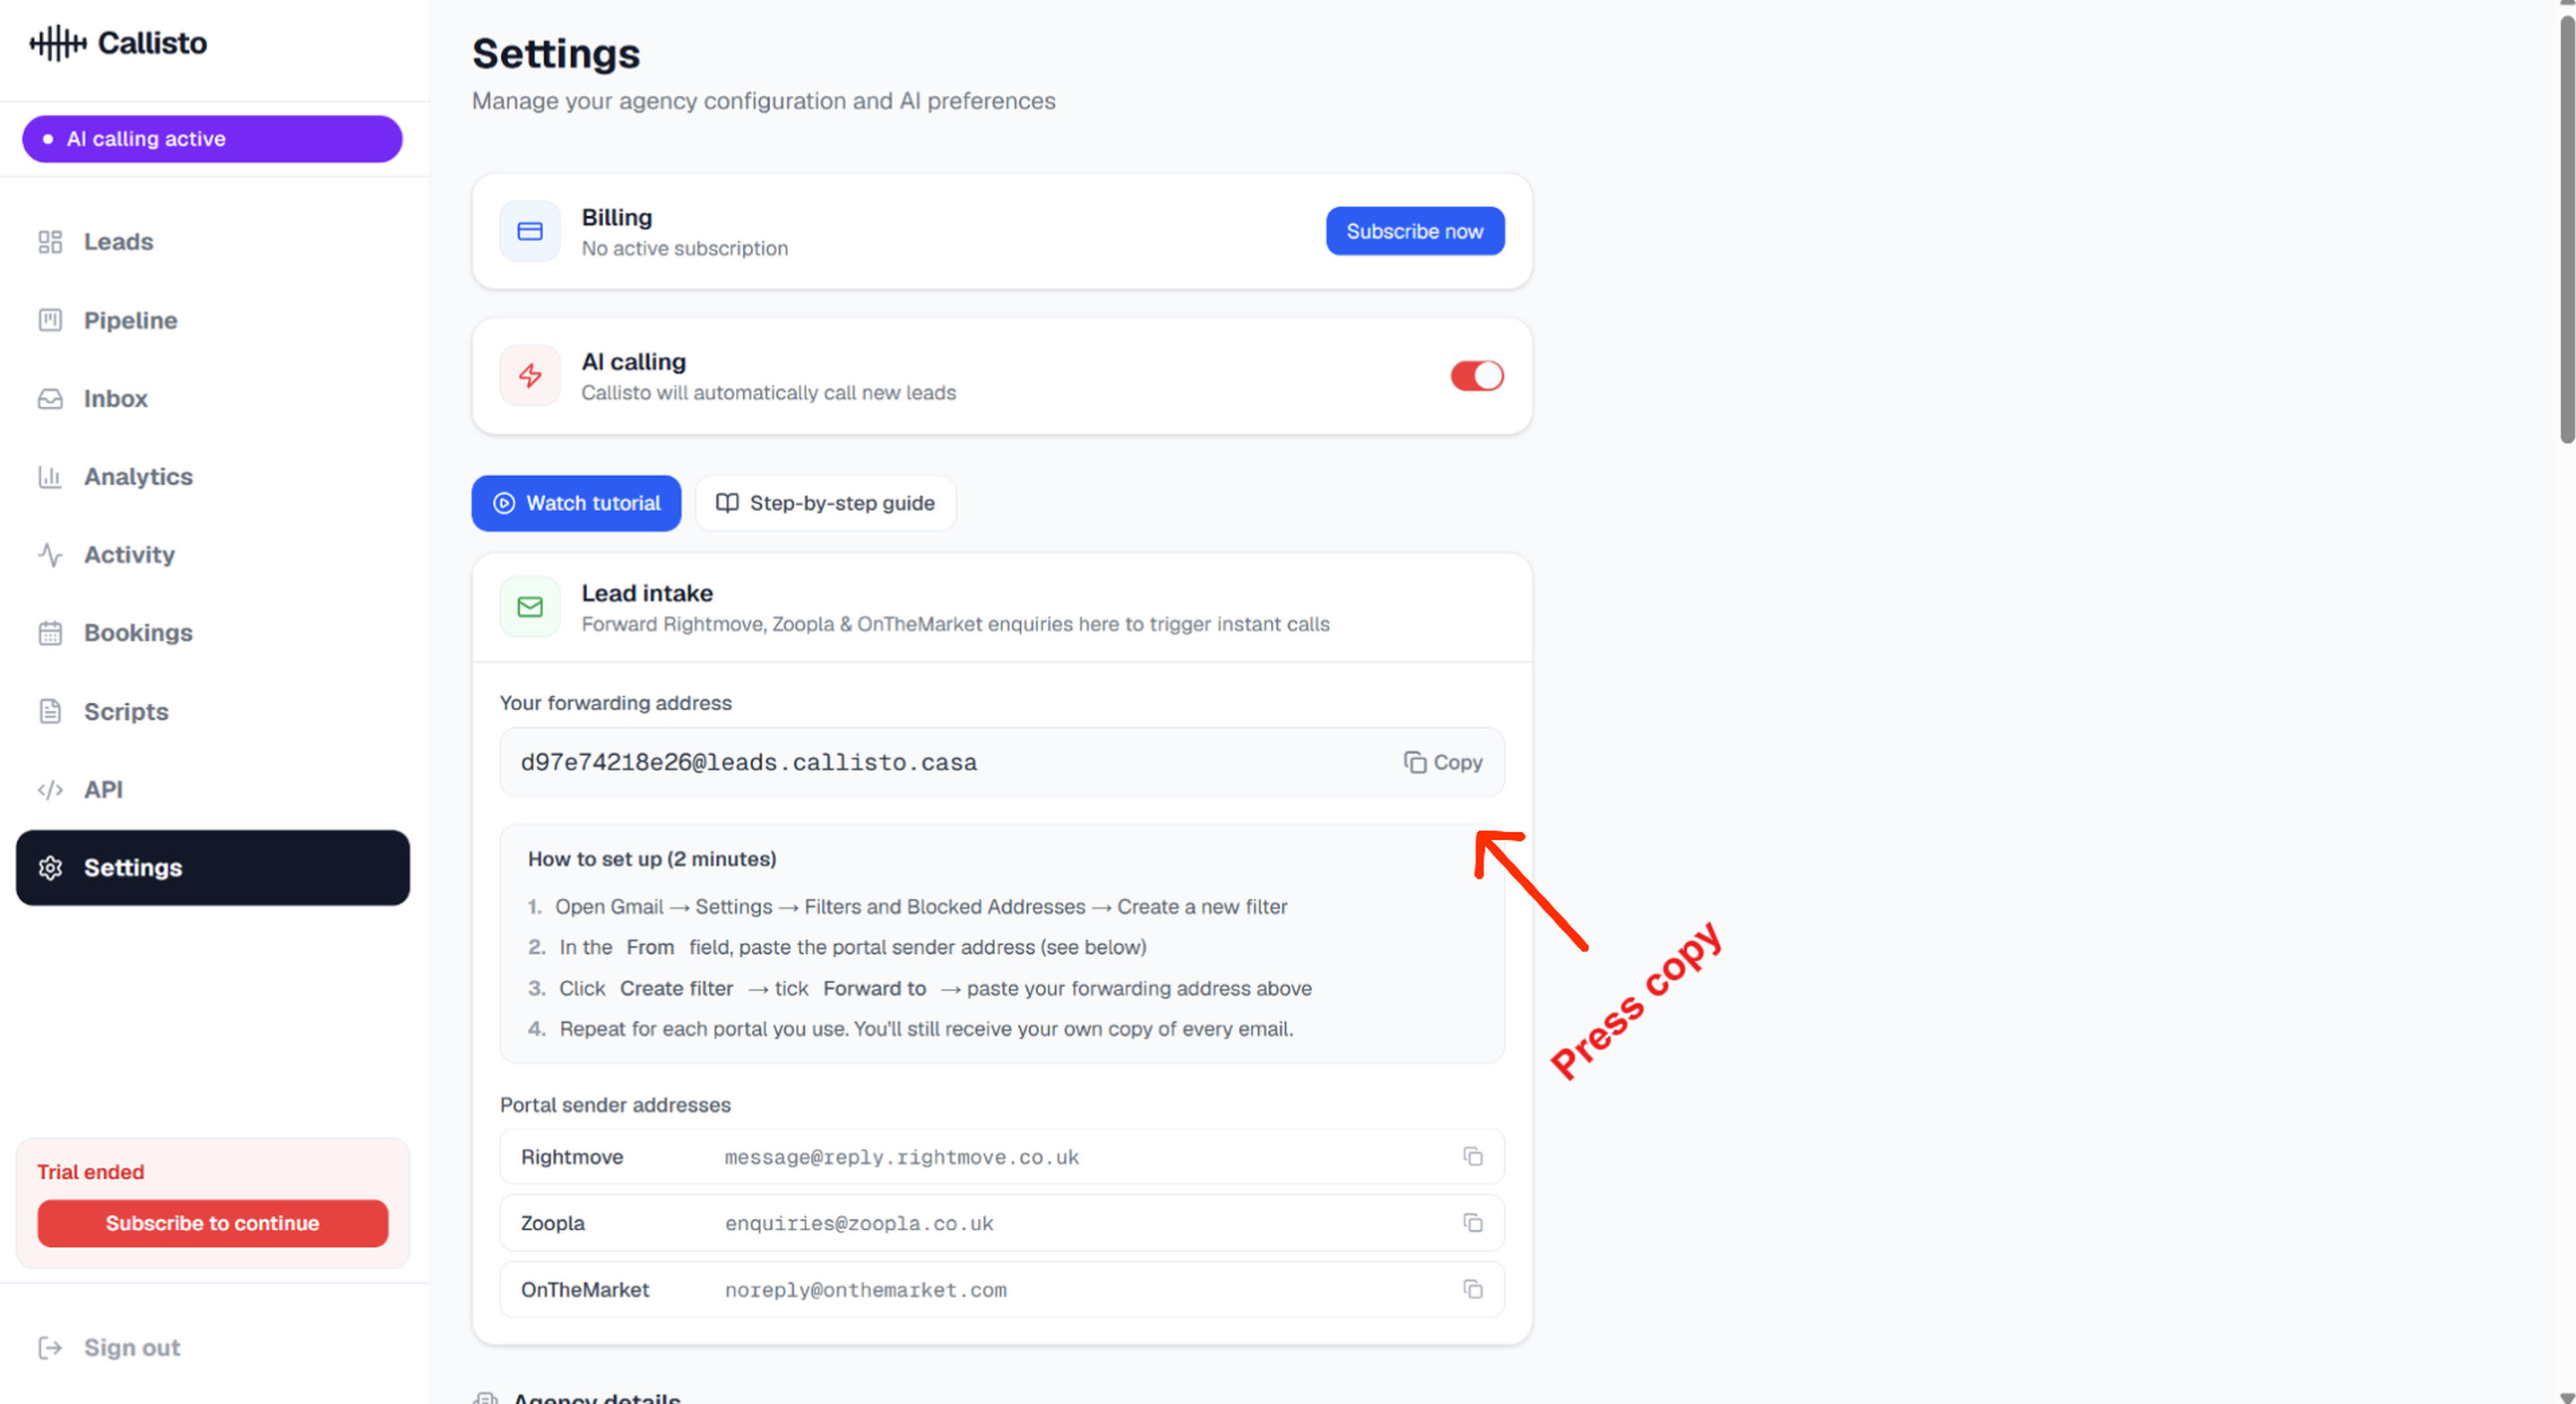
Step 1 — Copy your Callisto forwarding address
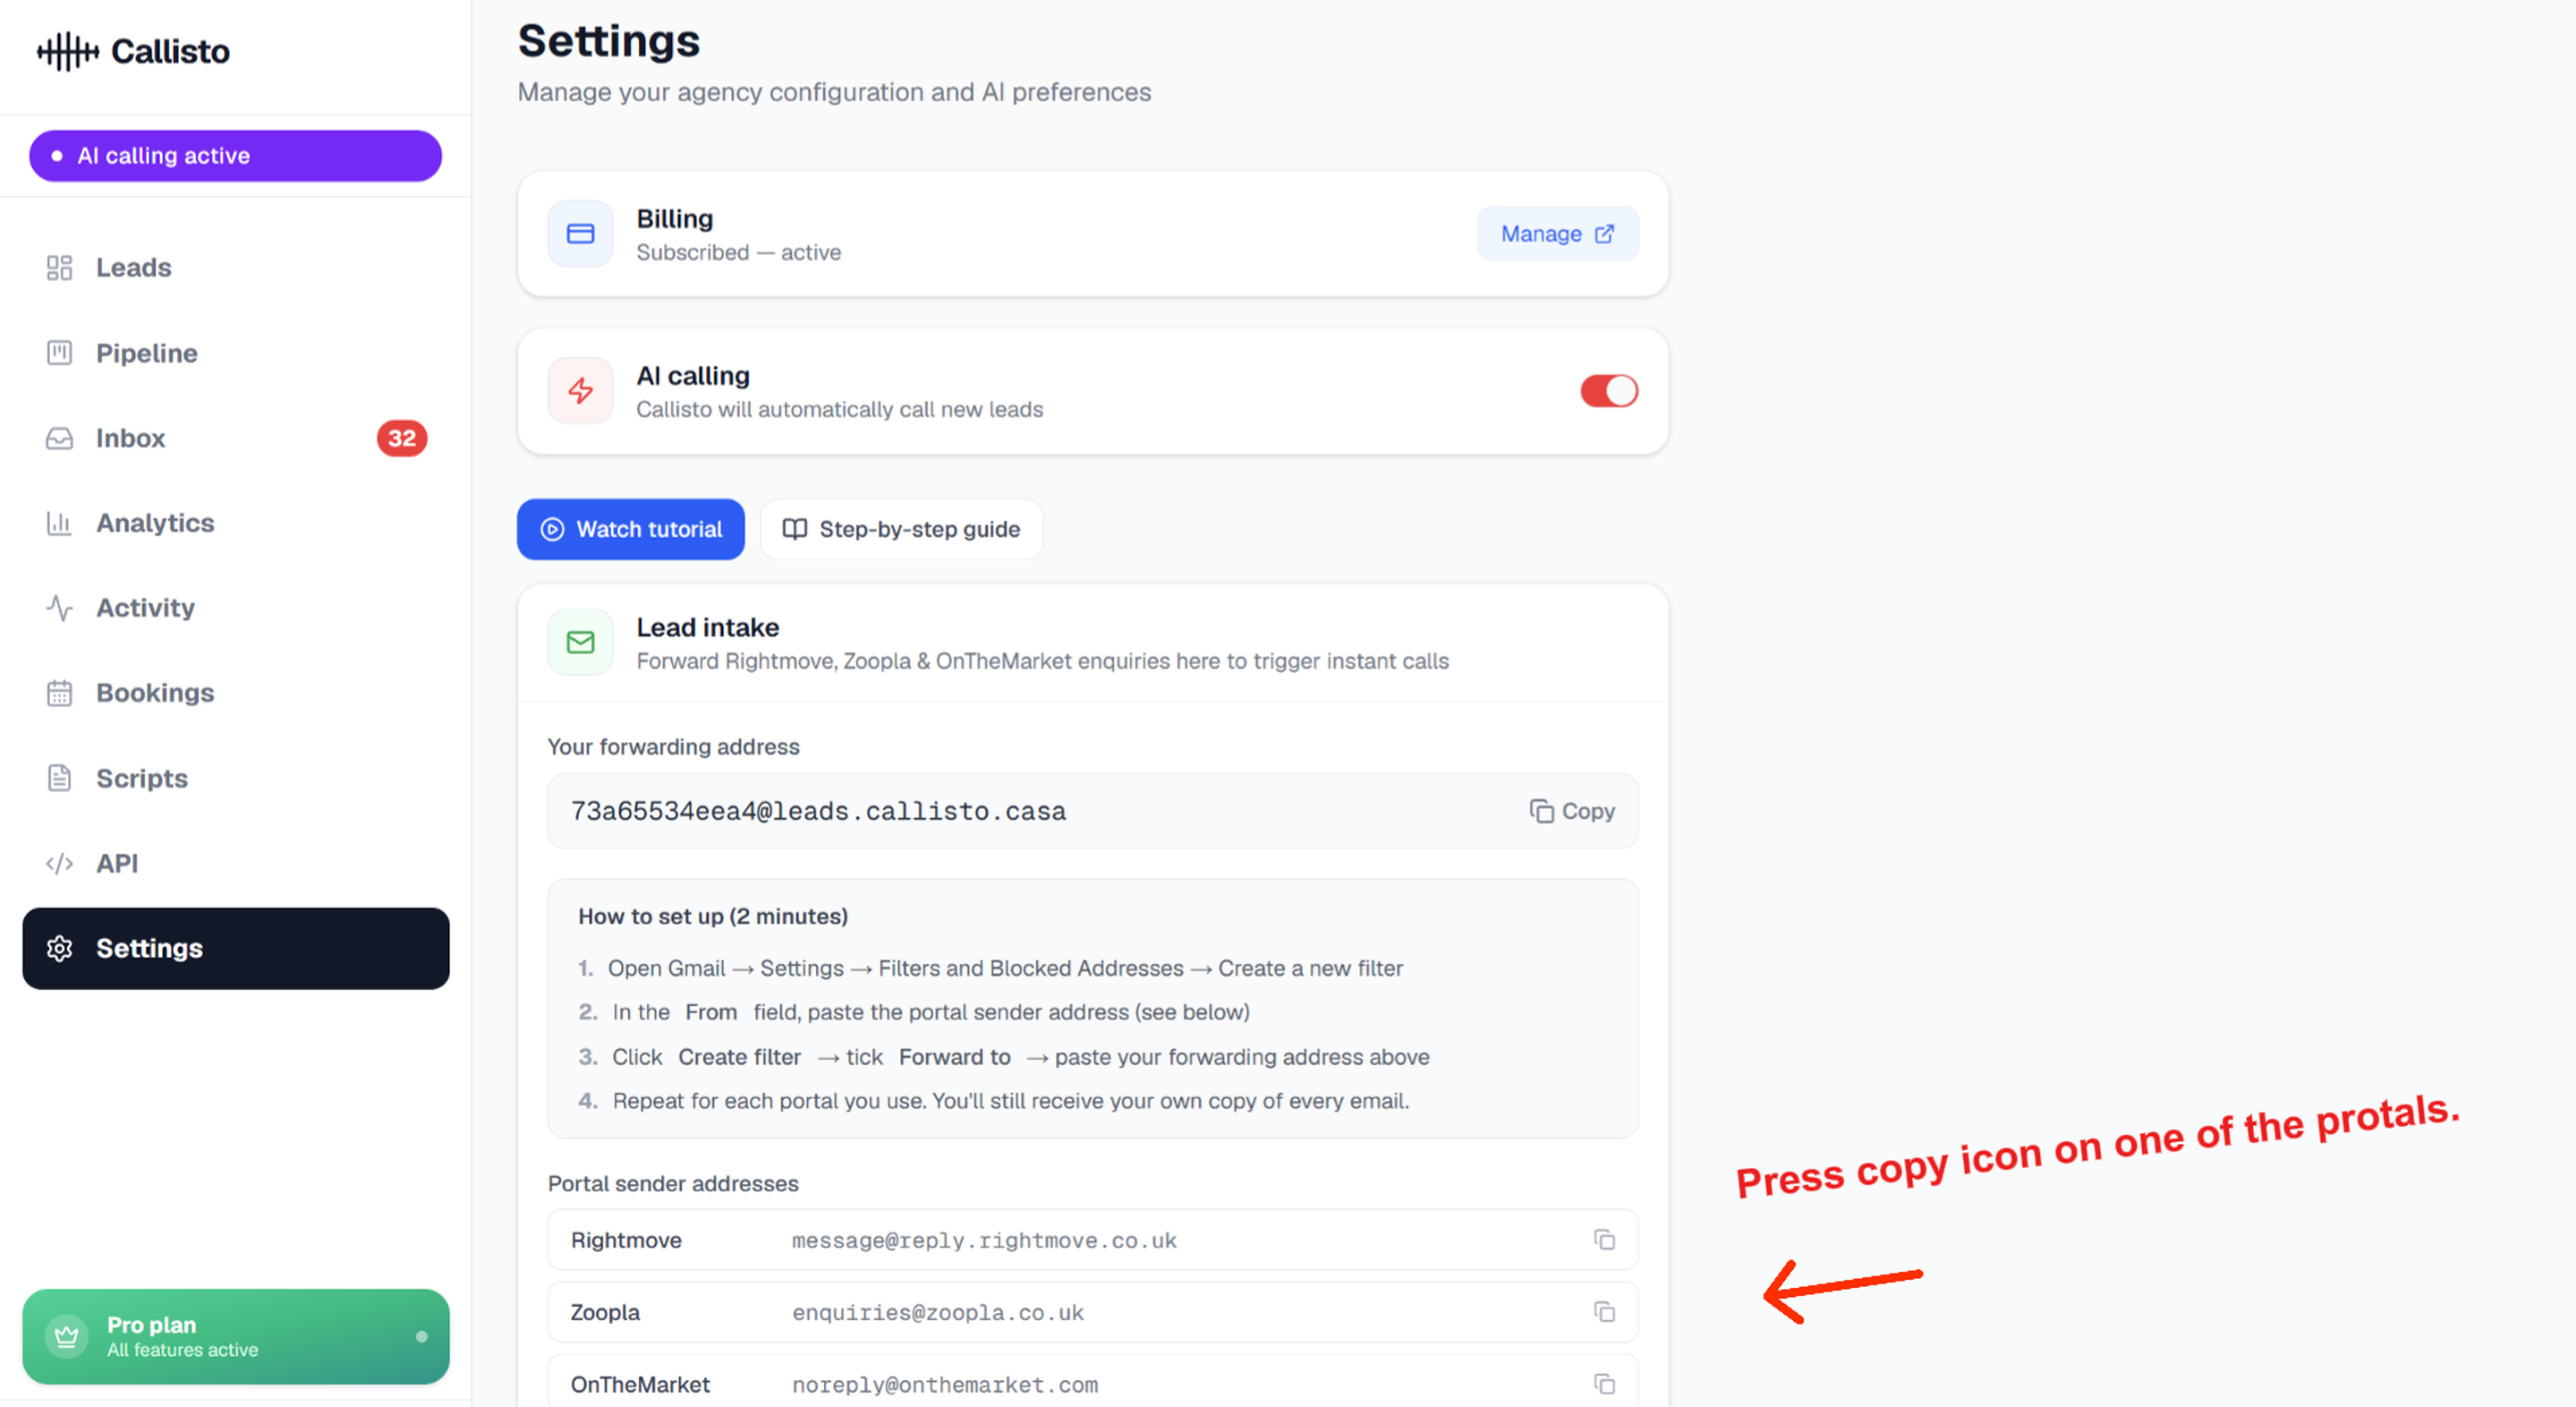
Open Callisto and go to Settings. In the Lead intake section you will see your unique forwarding address. Click the Copy button next to it.
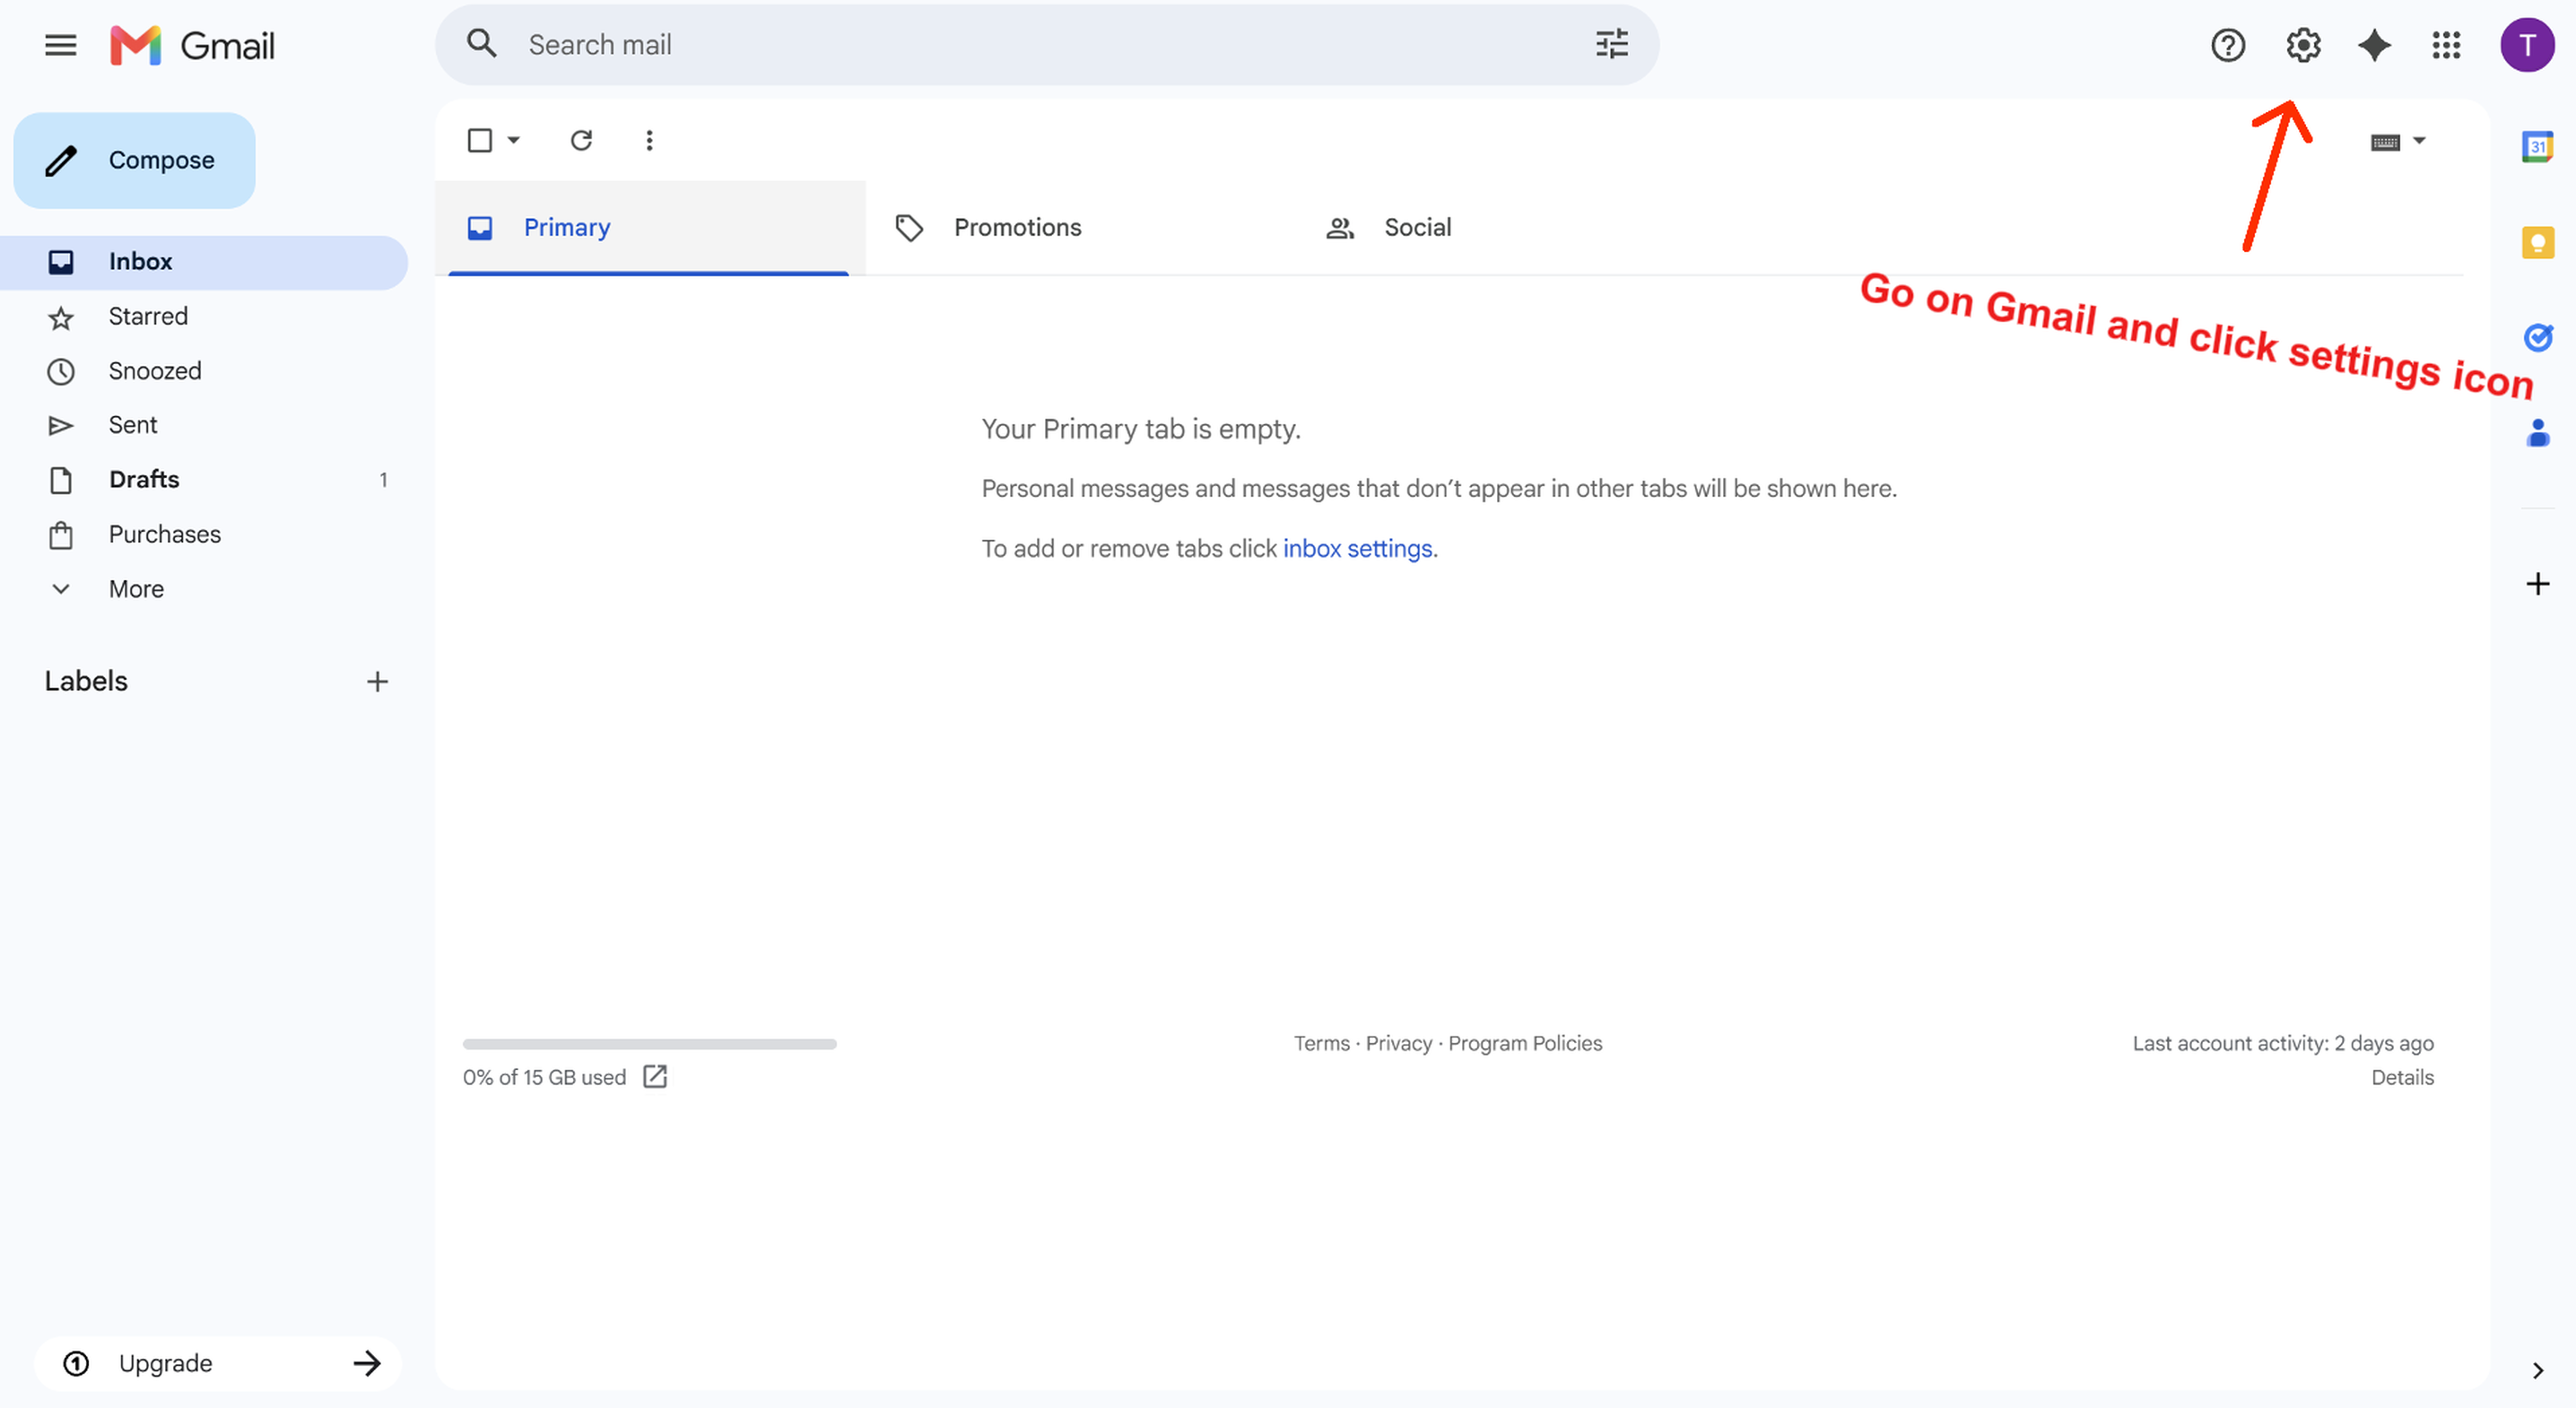
Step 2 — Open Gmail settings
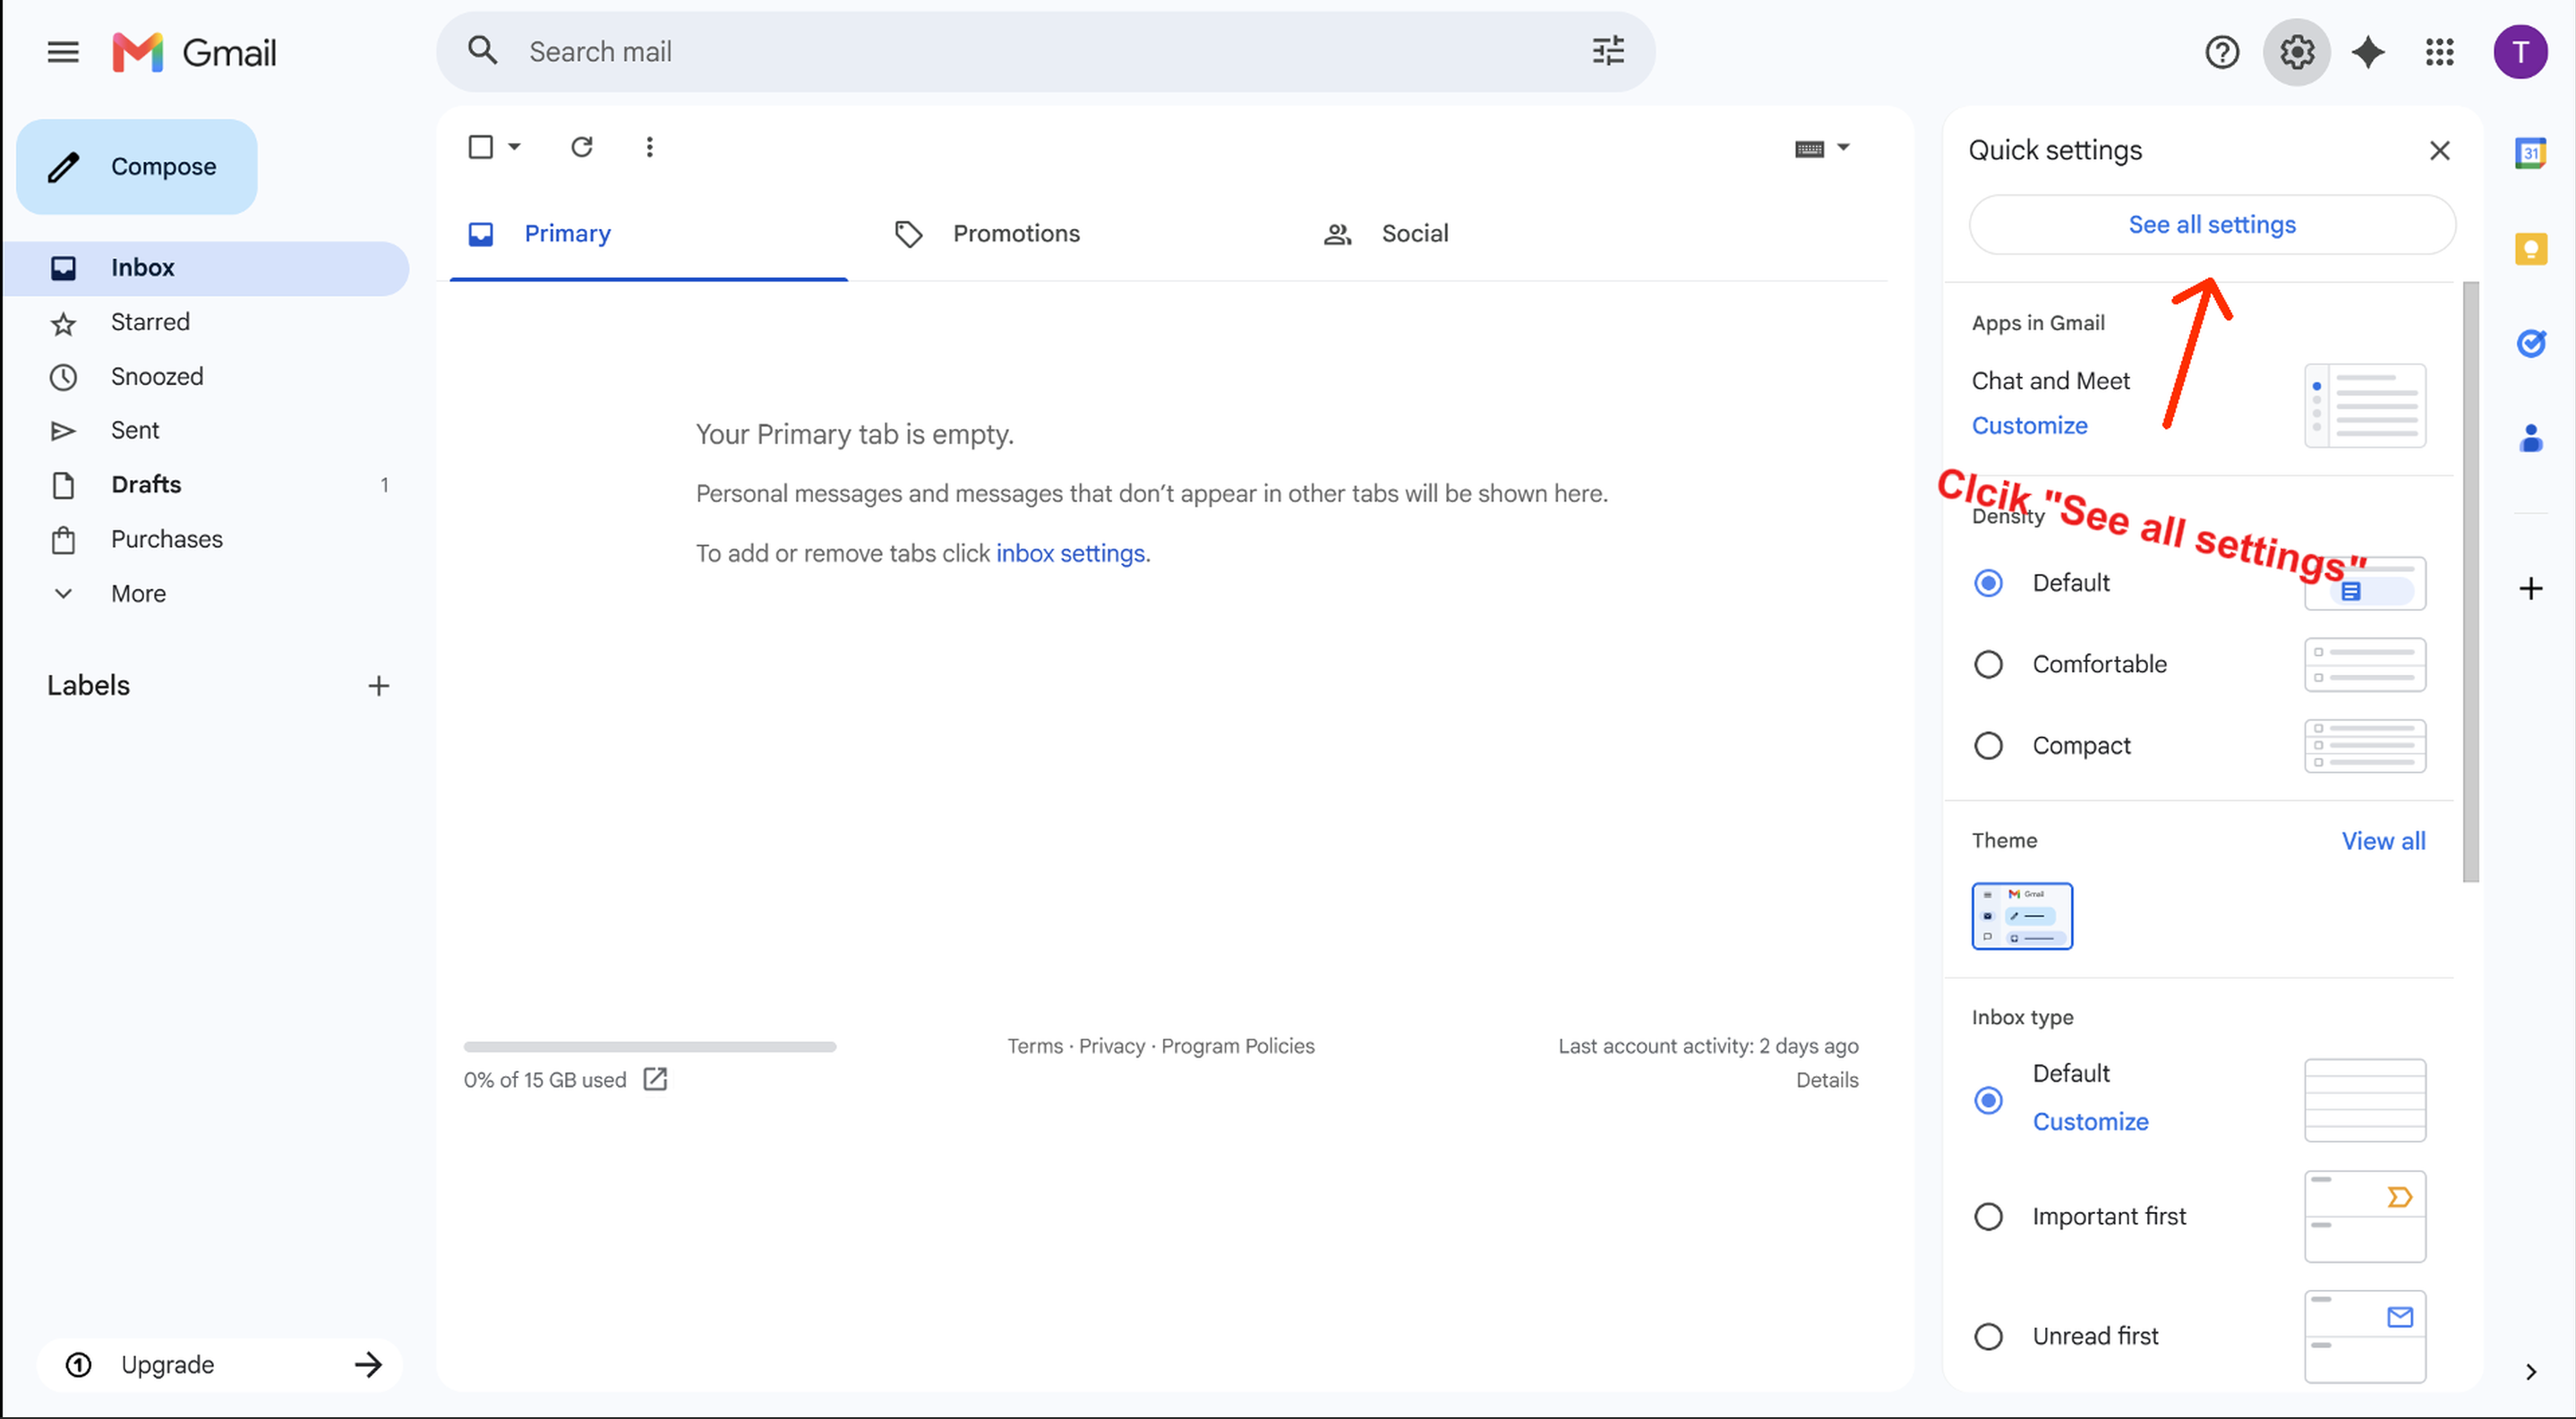
Go to Gmail. Click the gear icon in the top-right corner. A sidebar opens — click 'See all settings' at the top.
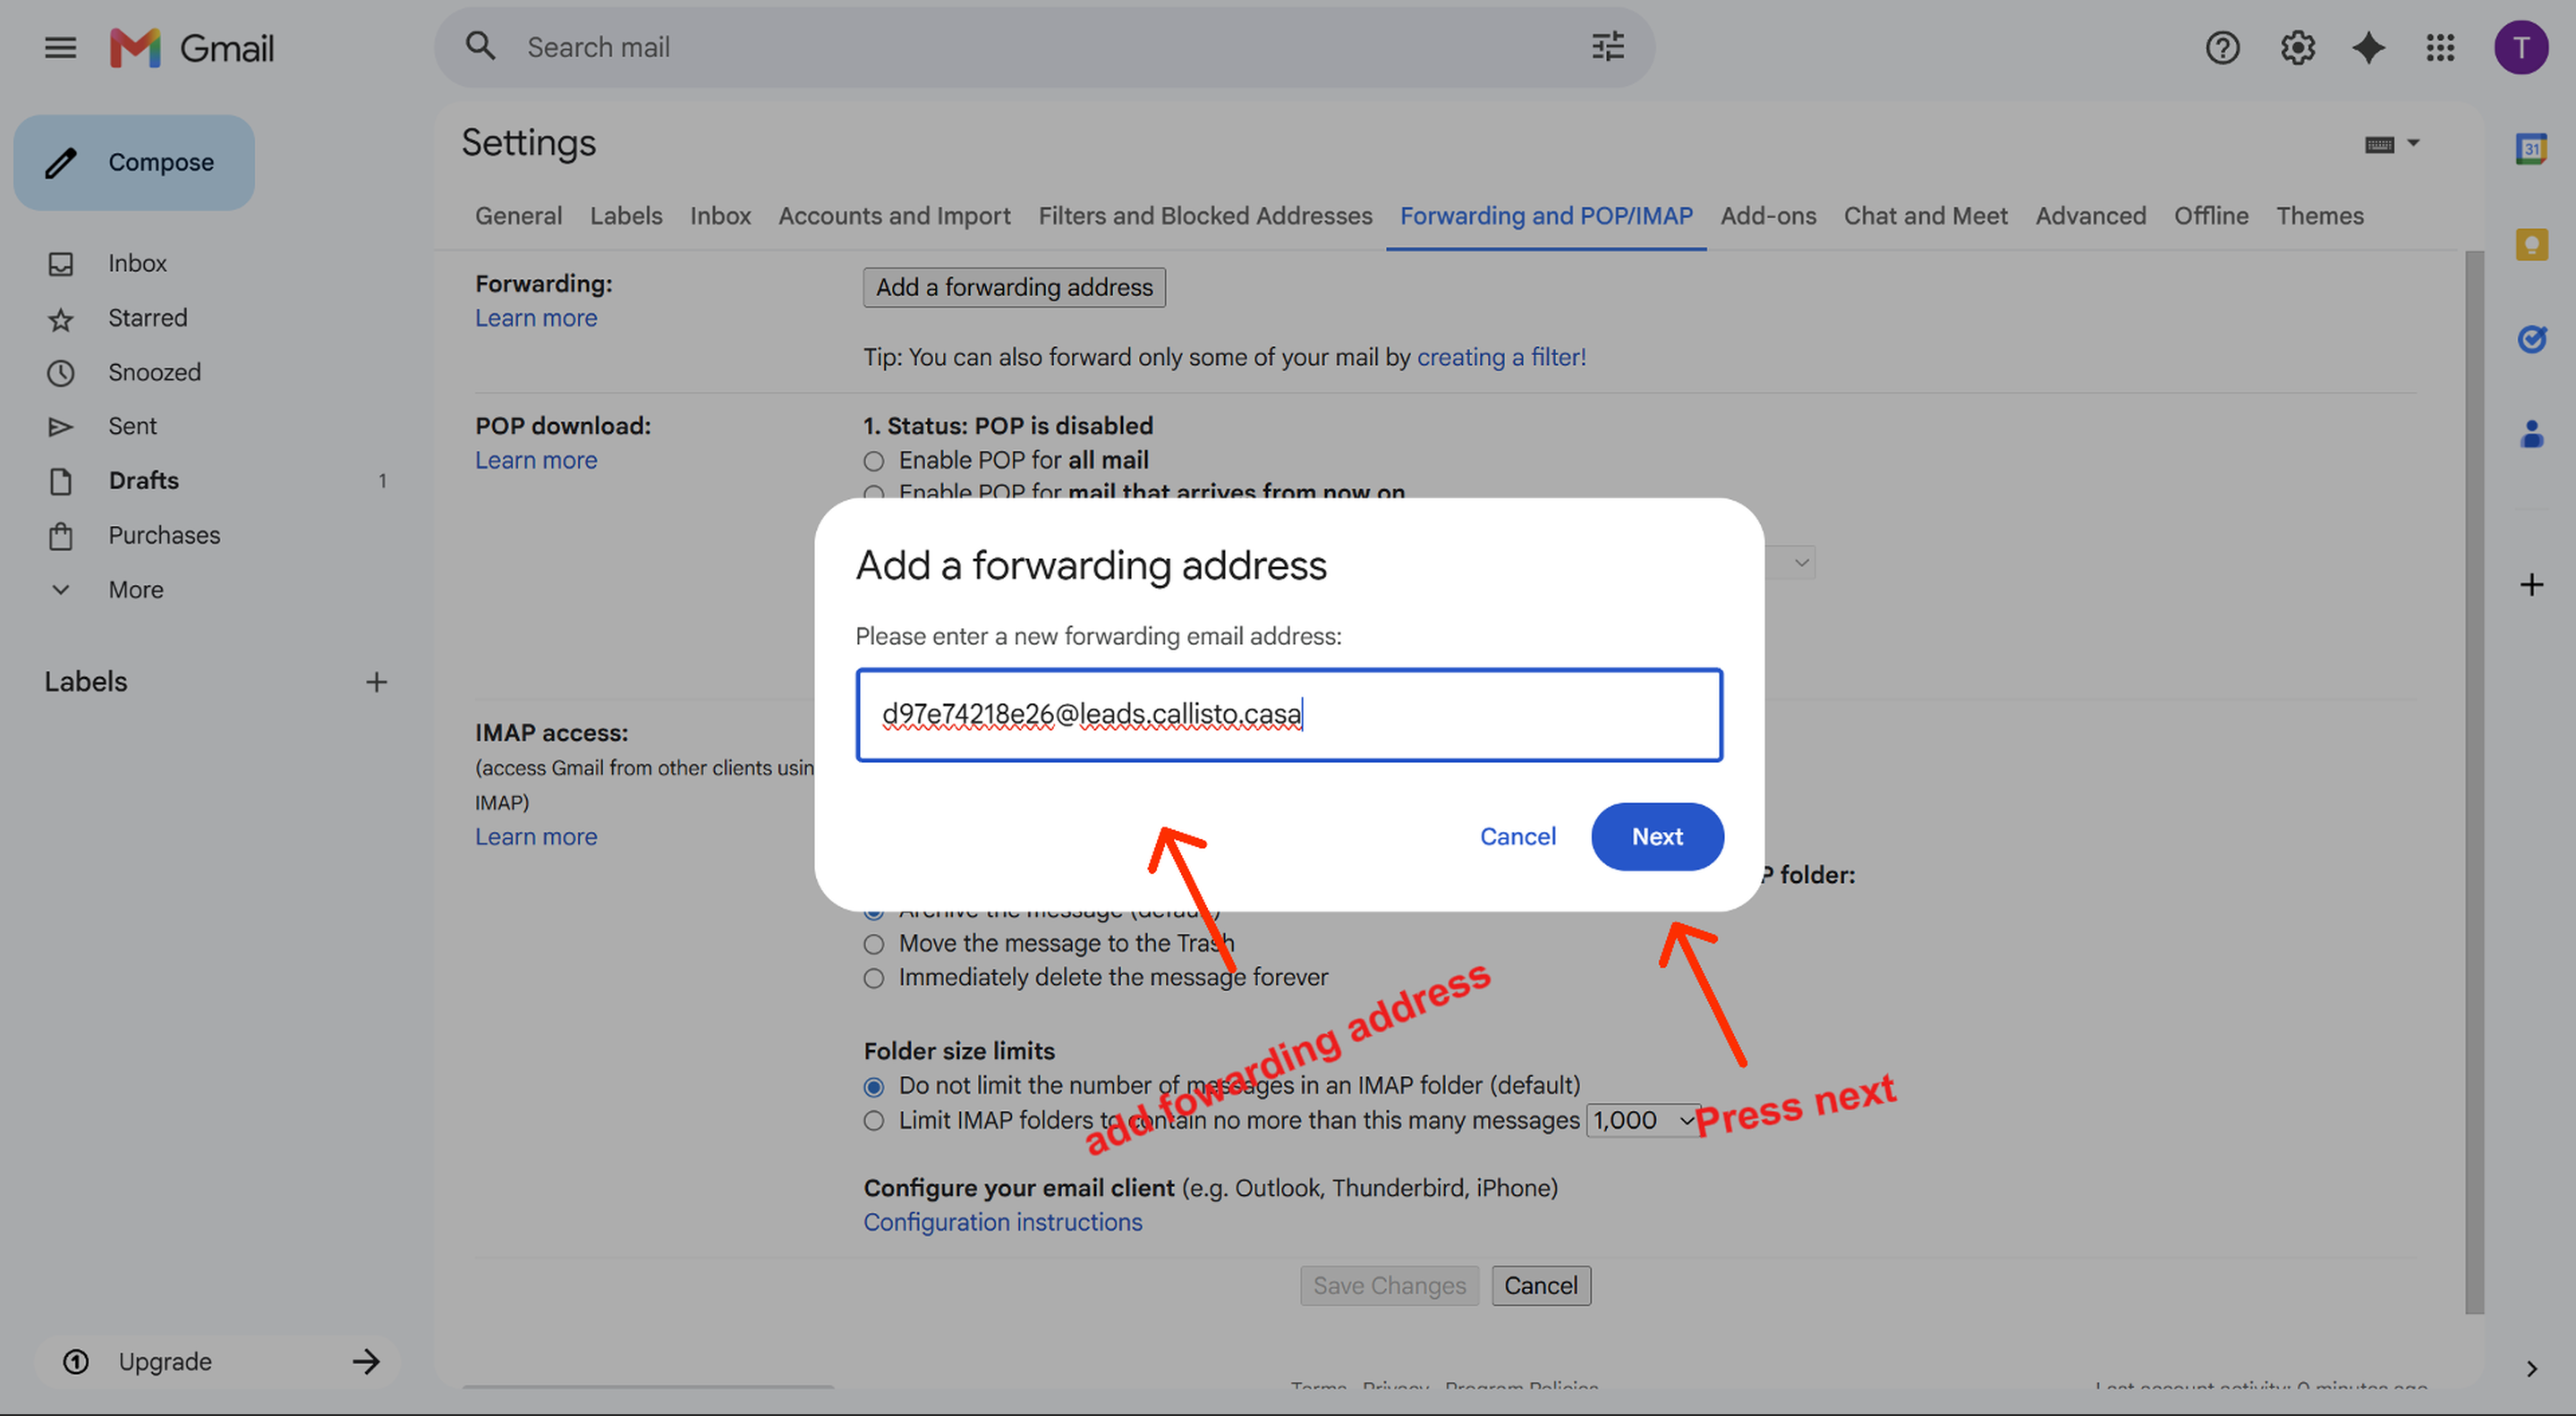
Step 3 — Add your forwarding address
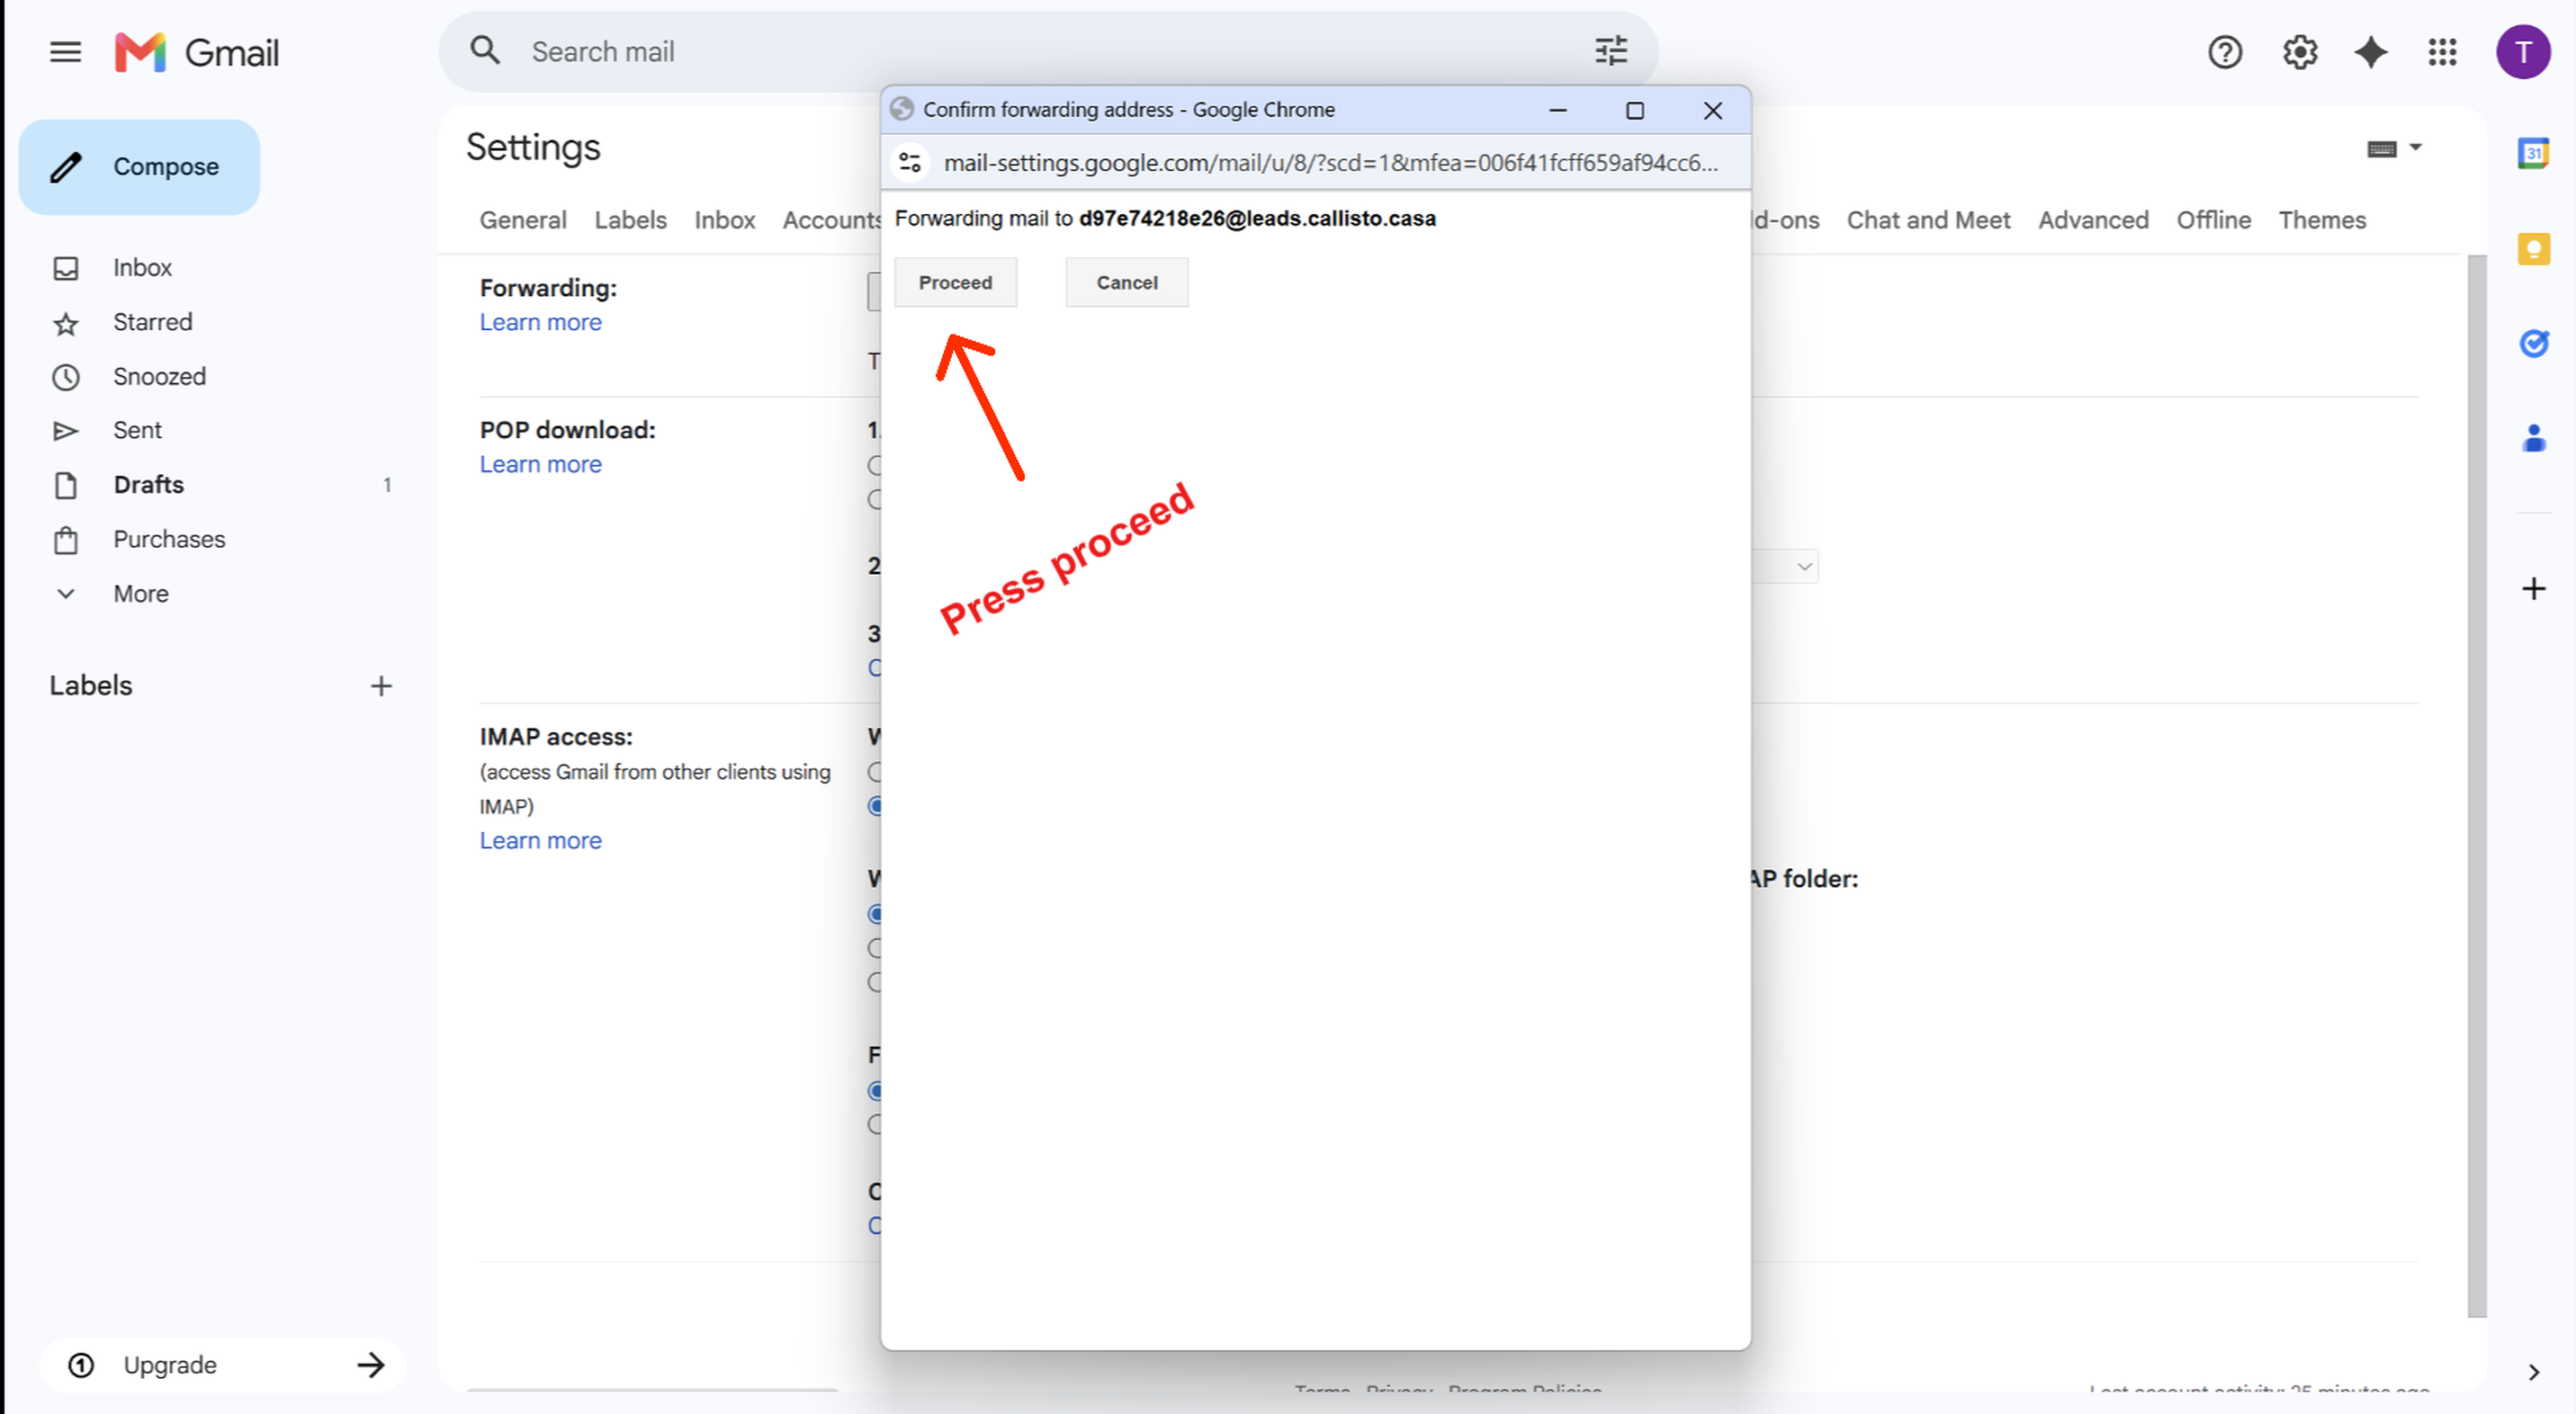
In Settings, click the 'Forwarding and POP/IMAP' tab. Click 'Add a forwarding address', paste your Callisto address, then click Next. A popup appears asking you to confirm — click Proceed.

Step 4 — Confirm the forwarding address
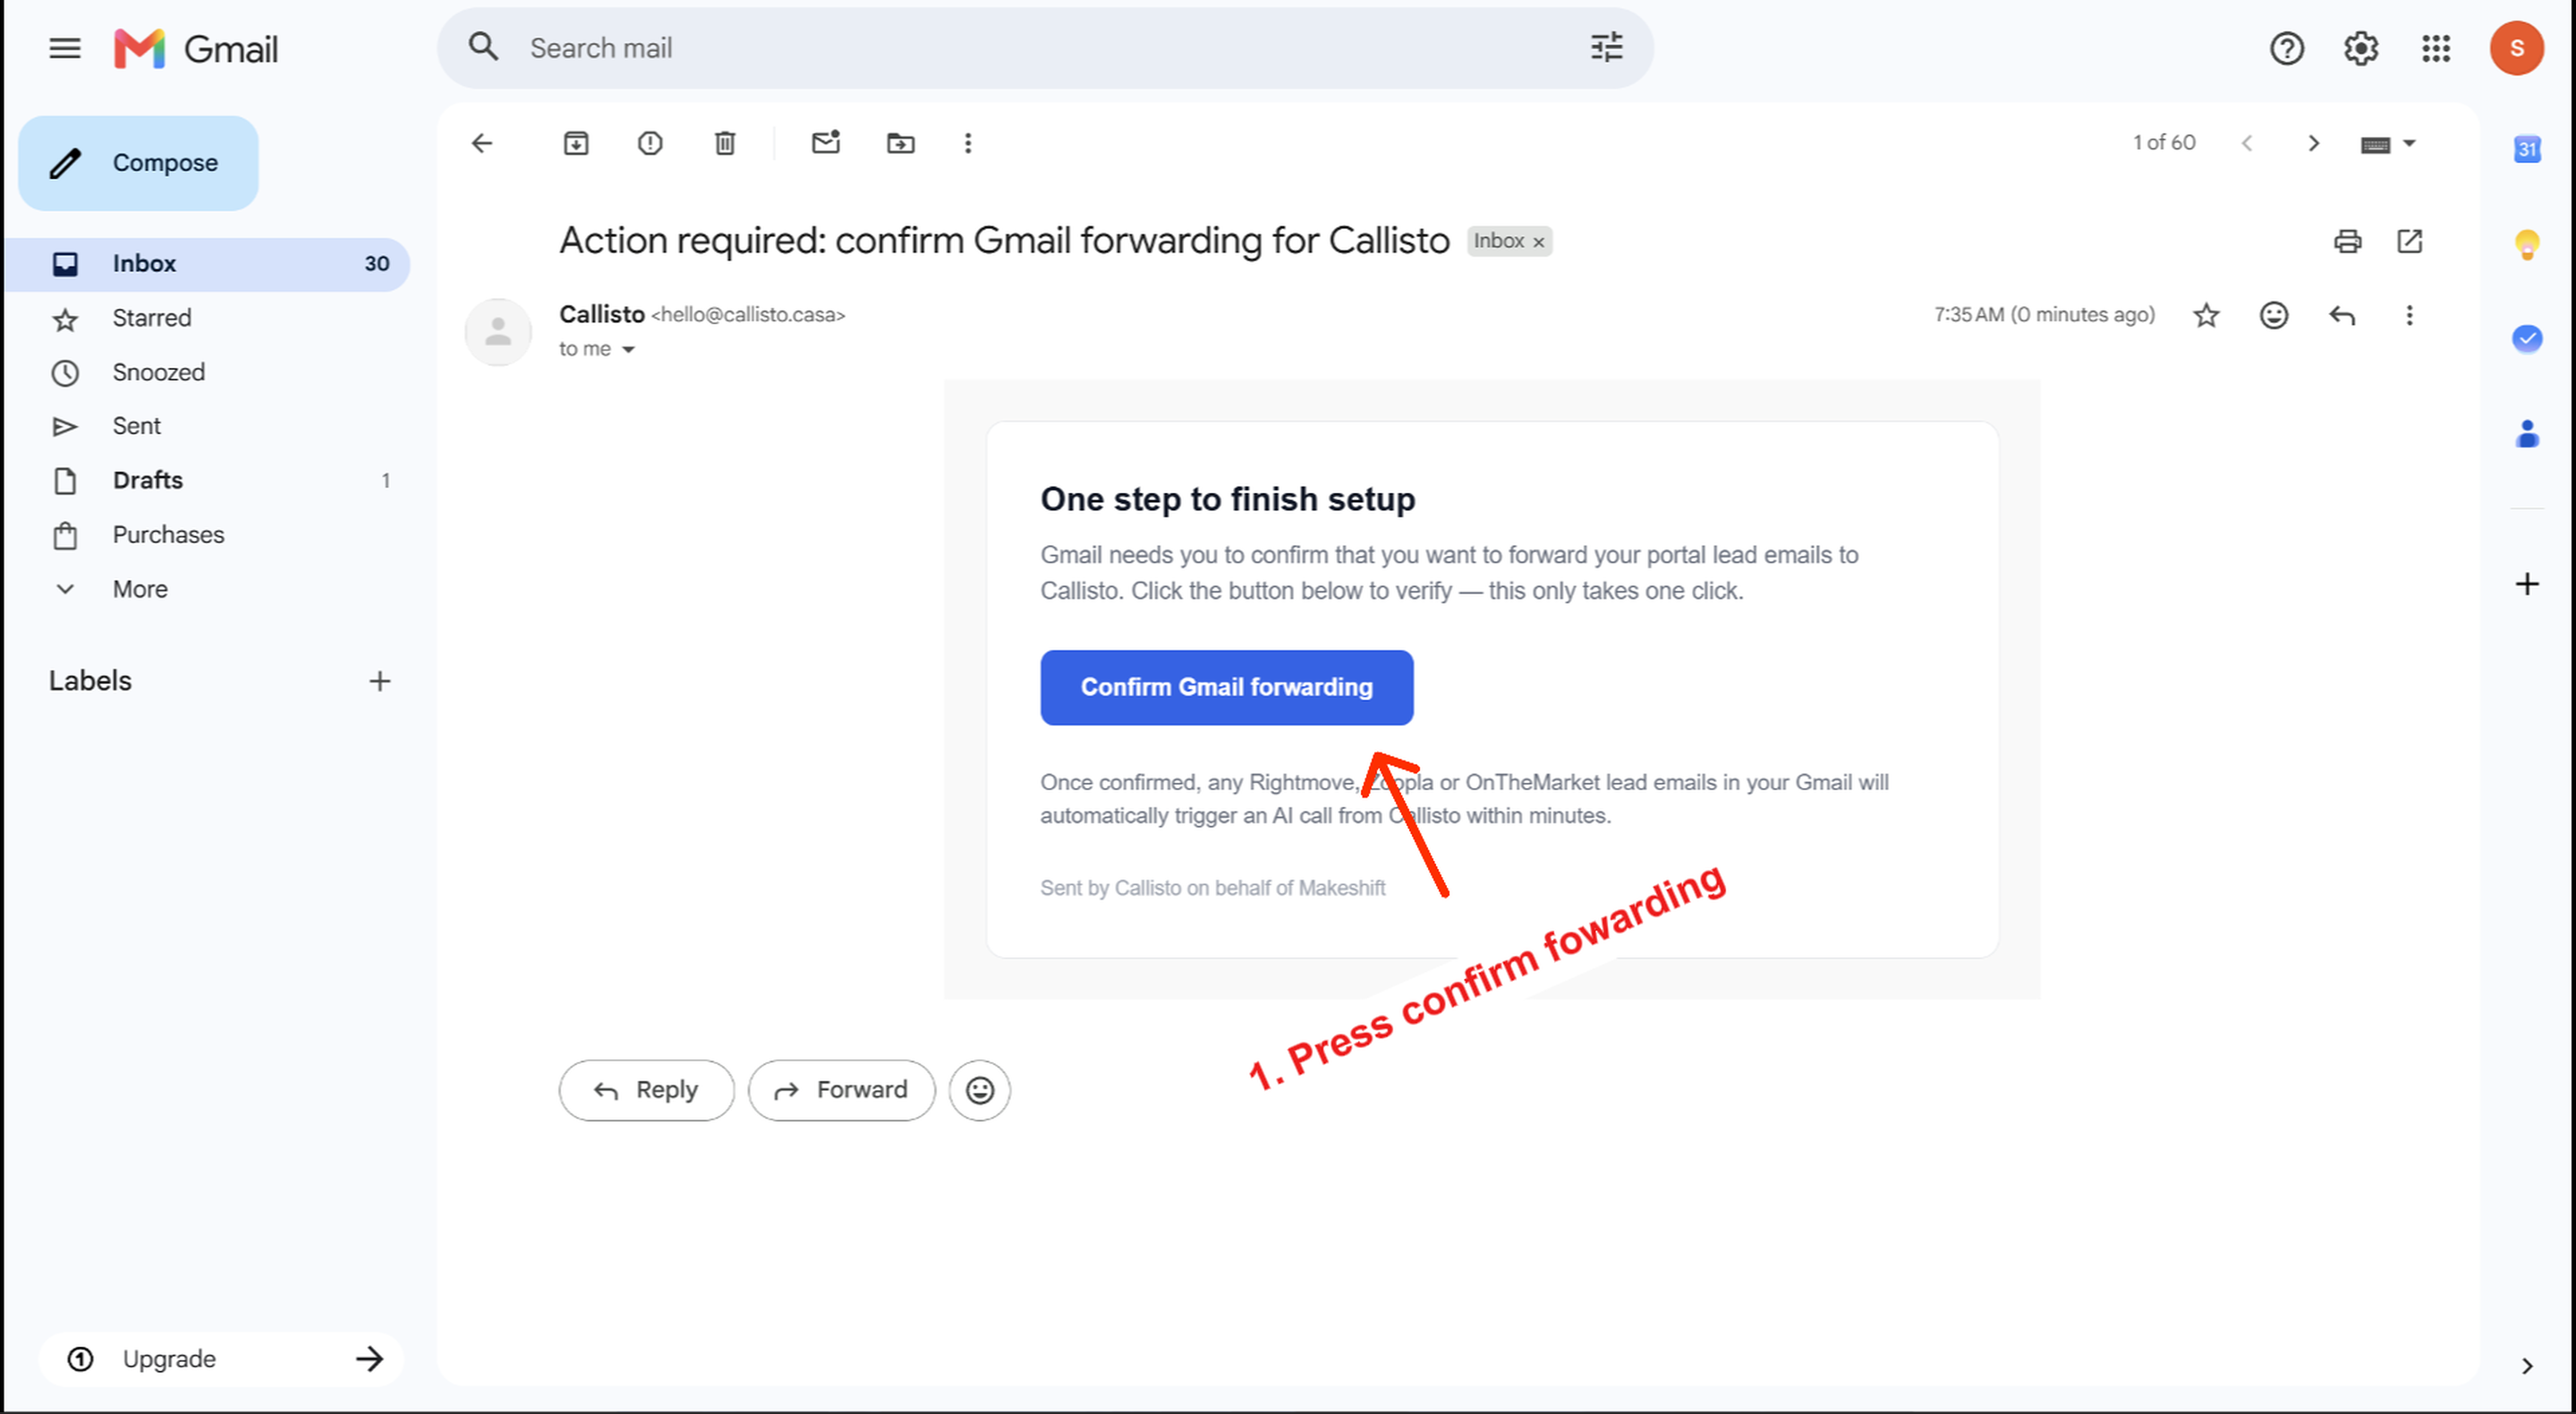
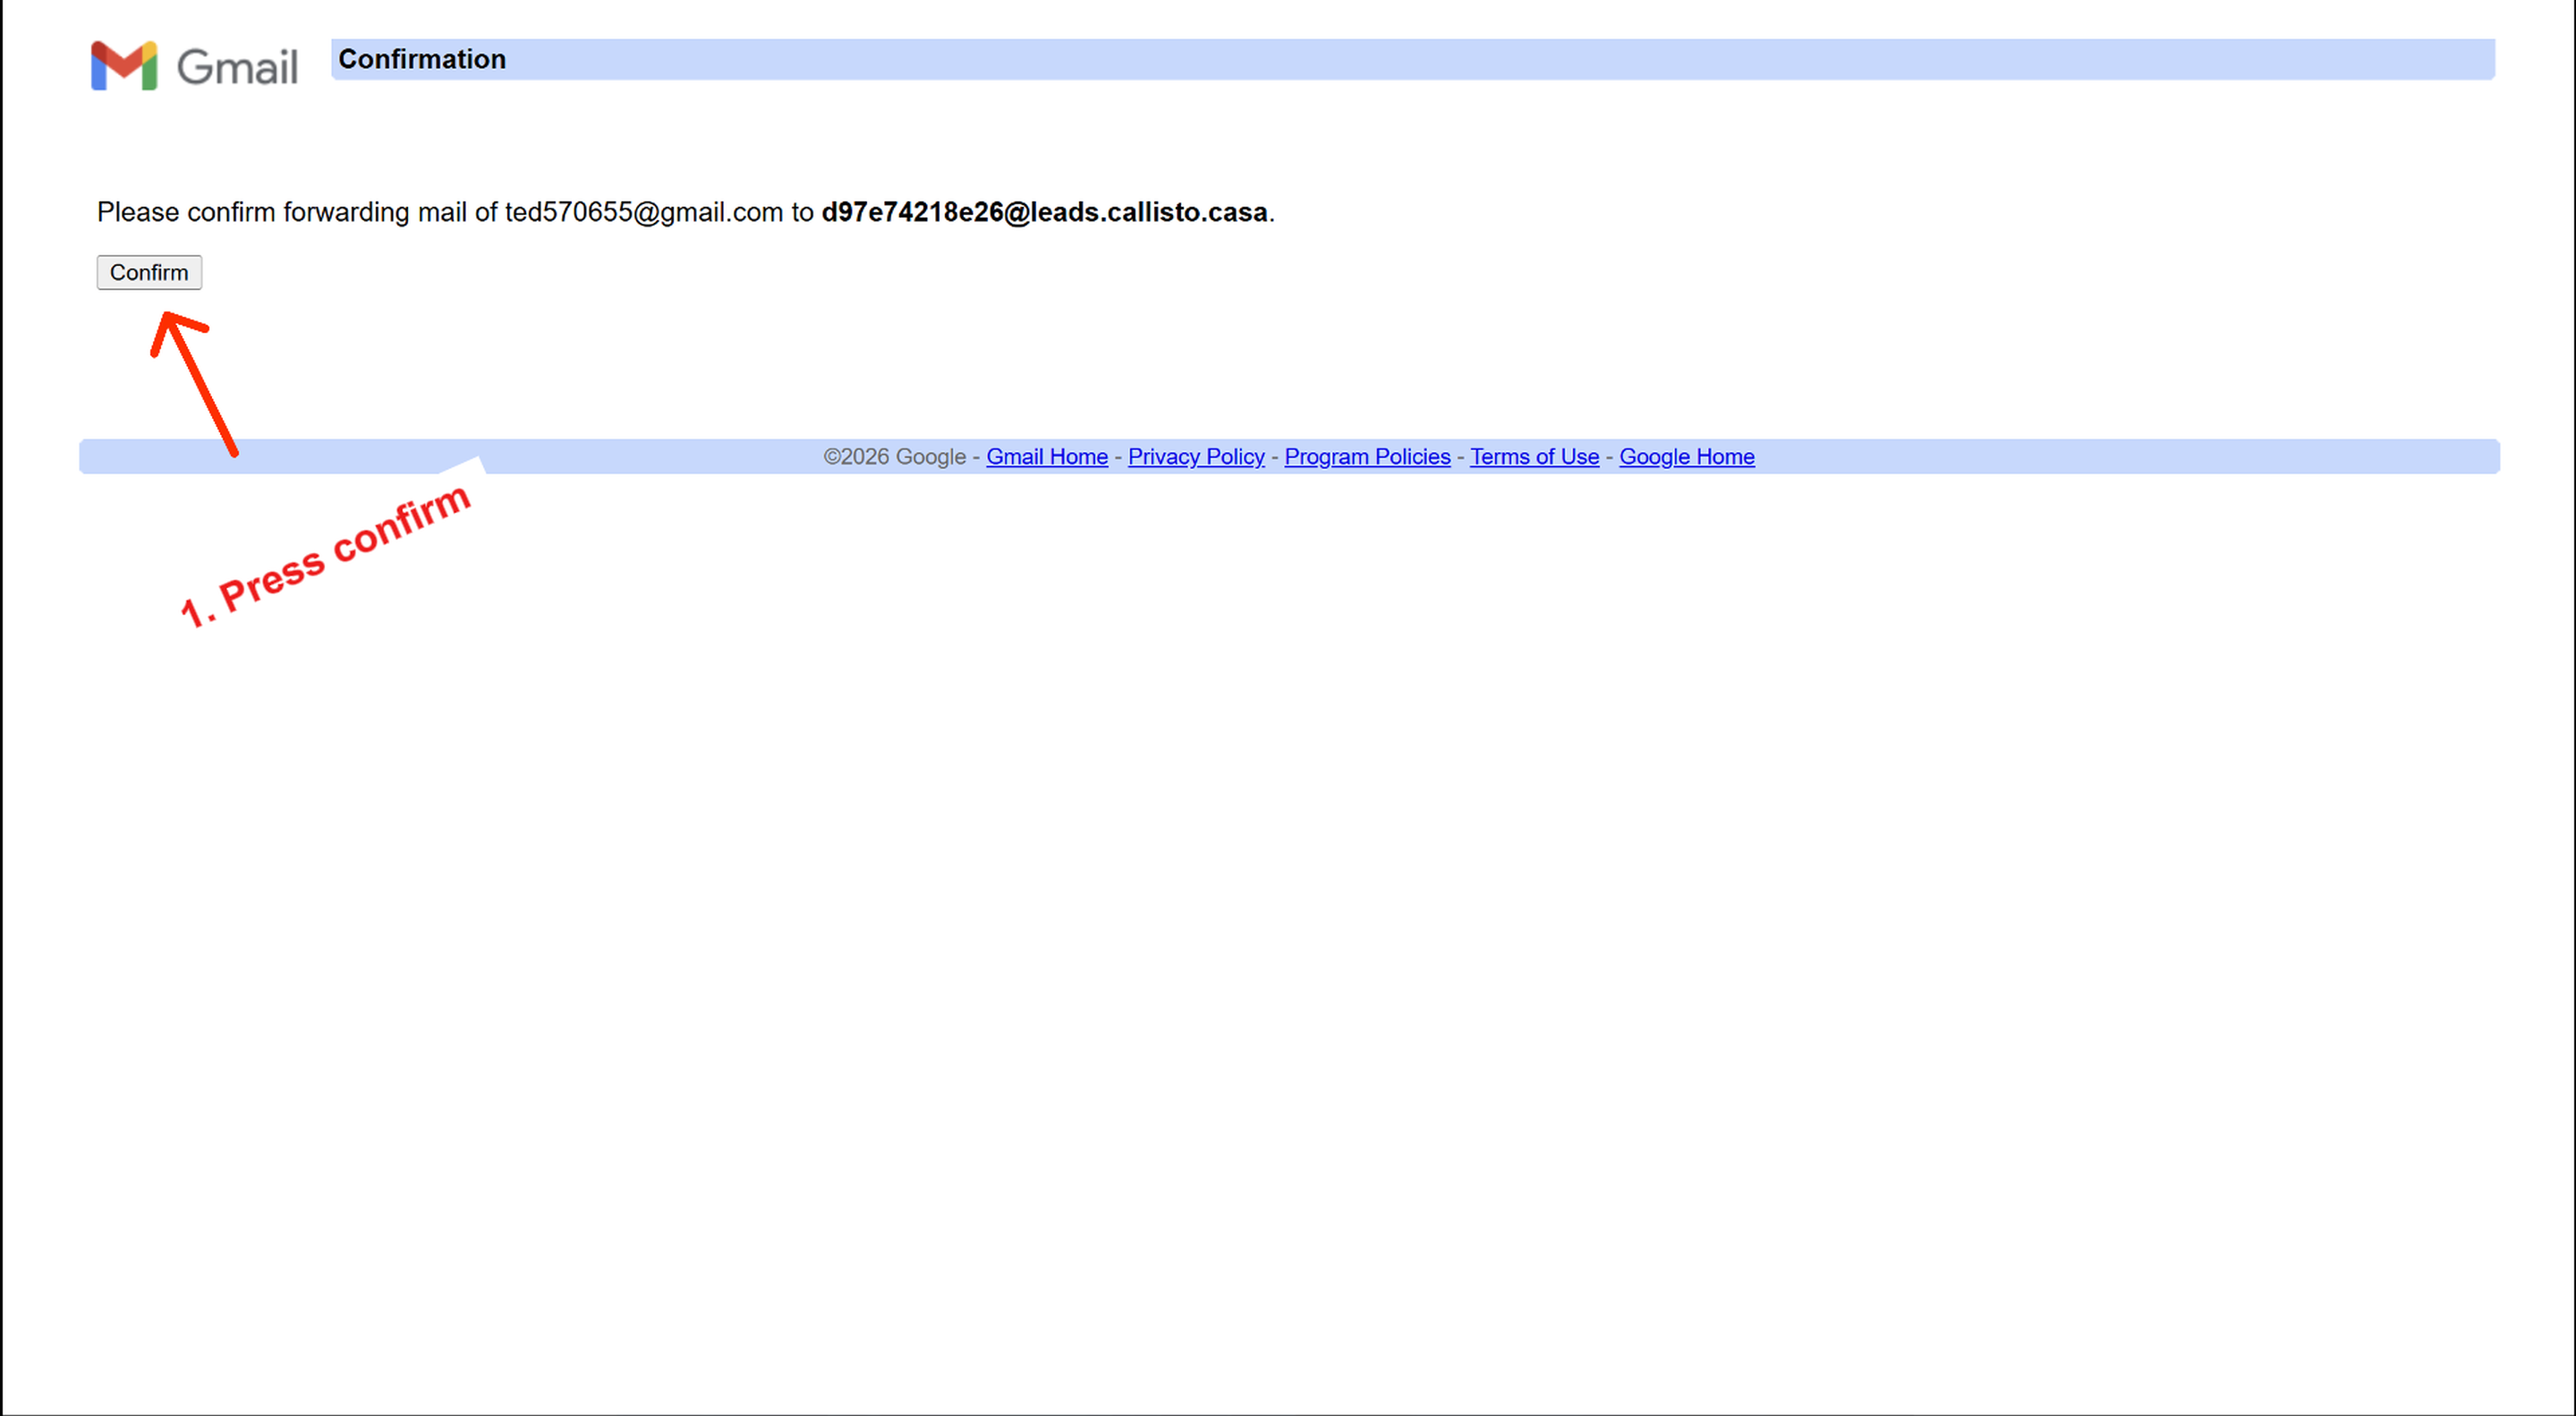
Callisto will send an email to your inbox with the subject 'Action required: confirm Gmail forwarding for Callisto'. Open that email and click the 'Confirm Gmail forwarding' button. Google will open a confirmation page — click Confirm to finish verifying the address.
Step 5 — Copy a portal sender address
Go back to Callisto Settings. Under 'Portal sender addresses' you will see the sending email for each portal: Rightmove uses message@reply.rightmove.co.uk, Zoopla uses enquiries@zoopla.co.uk, and OnTheMarket uses noreply@onthemarket.com. Click the copy icon next to the portal you want to set up first.
Step 6 — Create a Gmail filter
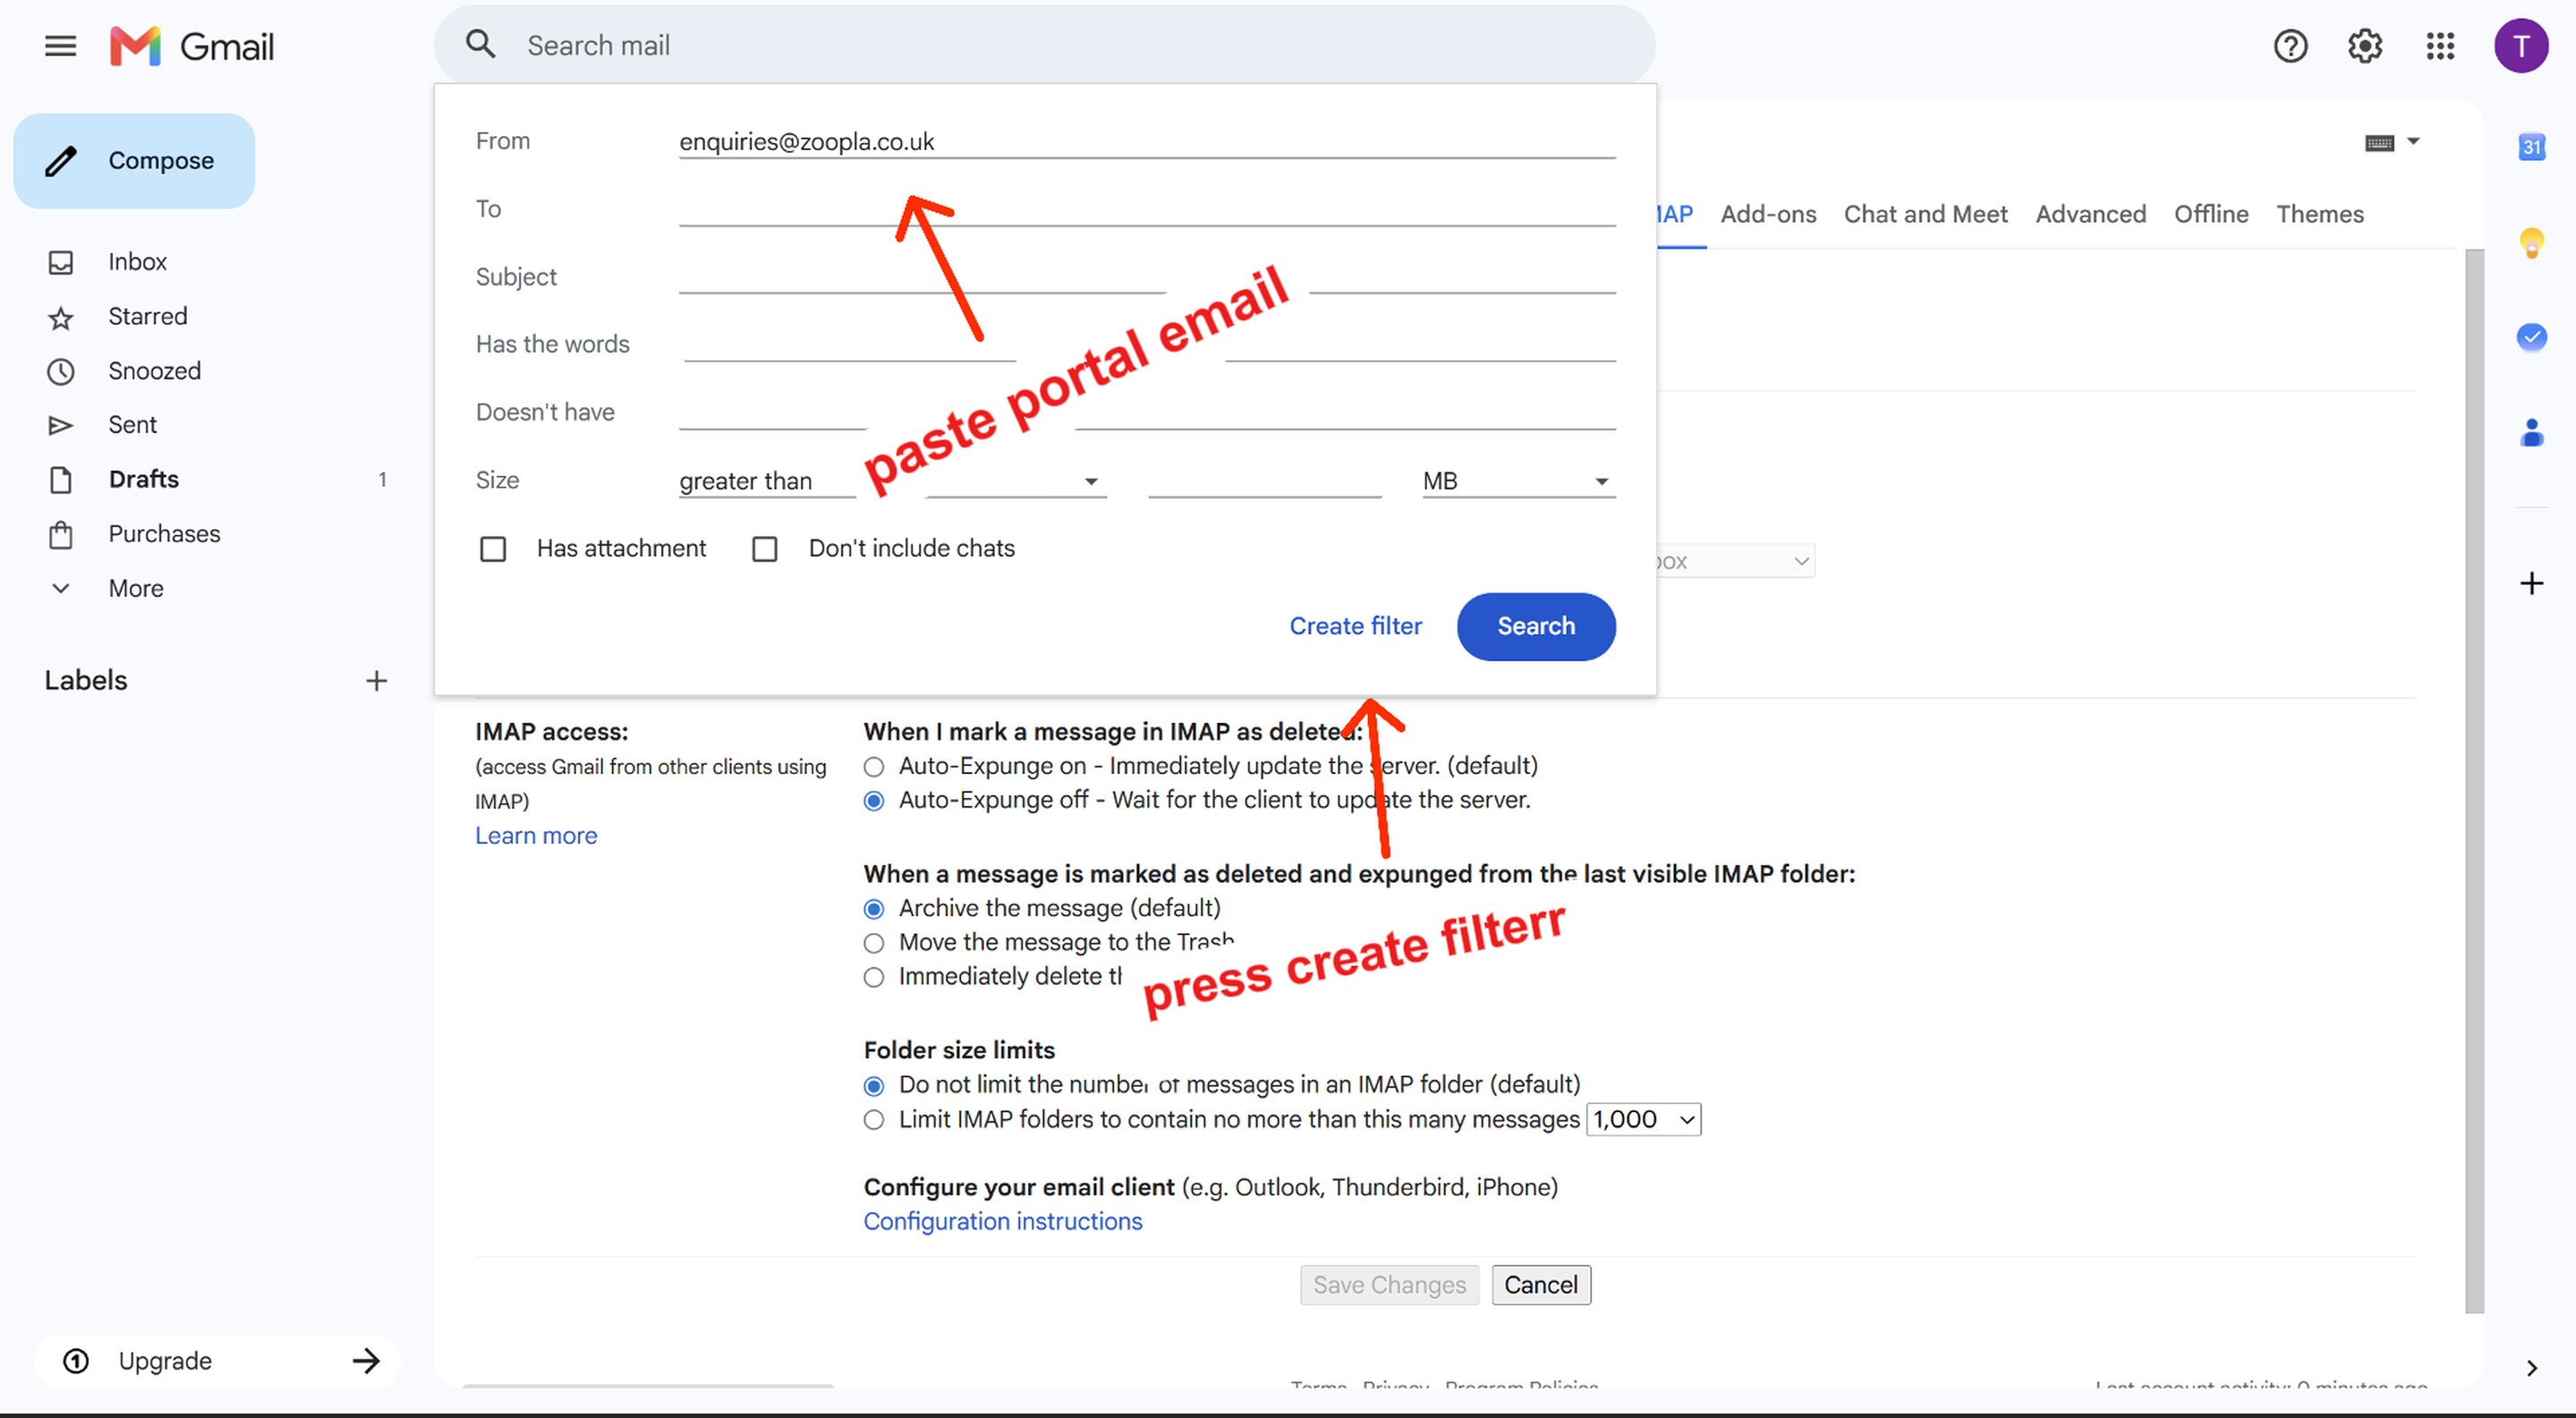
In Gmail Settings → Forwarding and POP/IMAP, click the 'using filters' link. A search criteria dialog appears. Paste the portal sender address into the From field, then click 'Create filter'.

Step 7 — Set the filter action
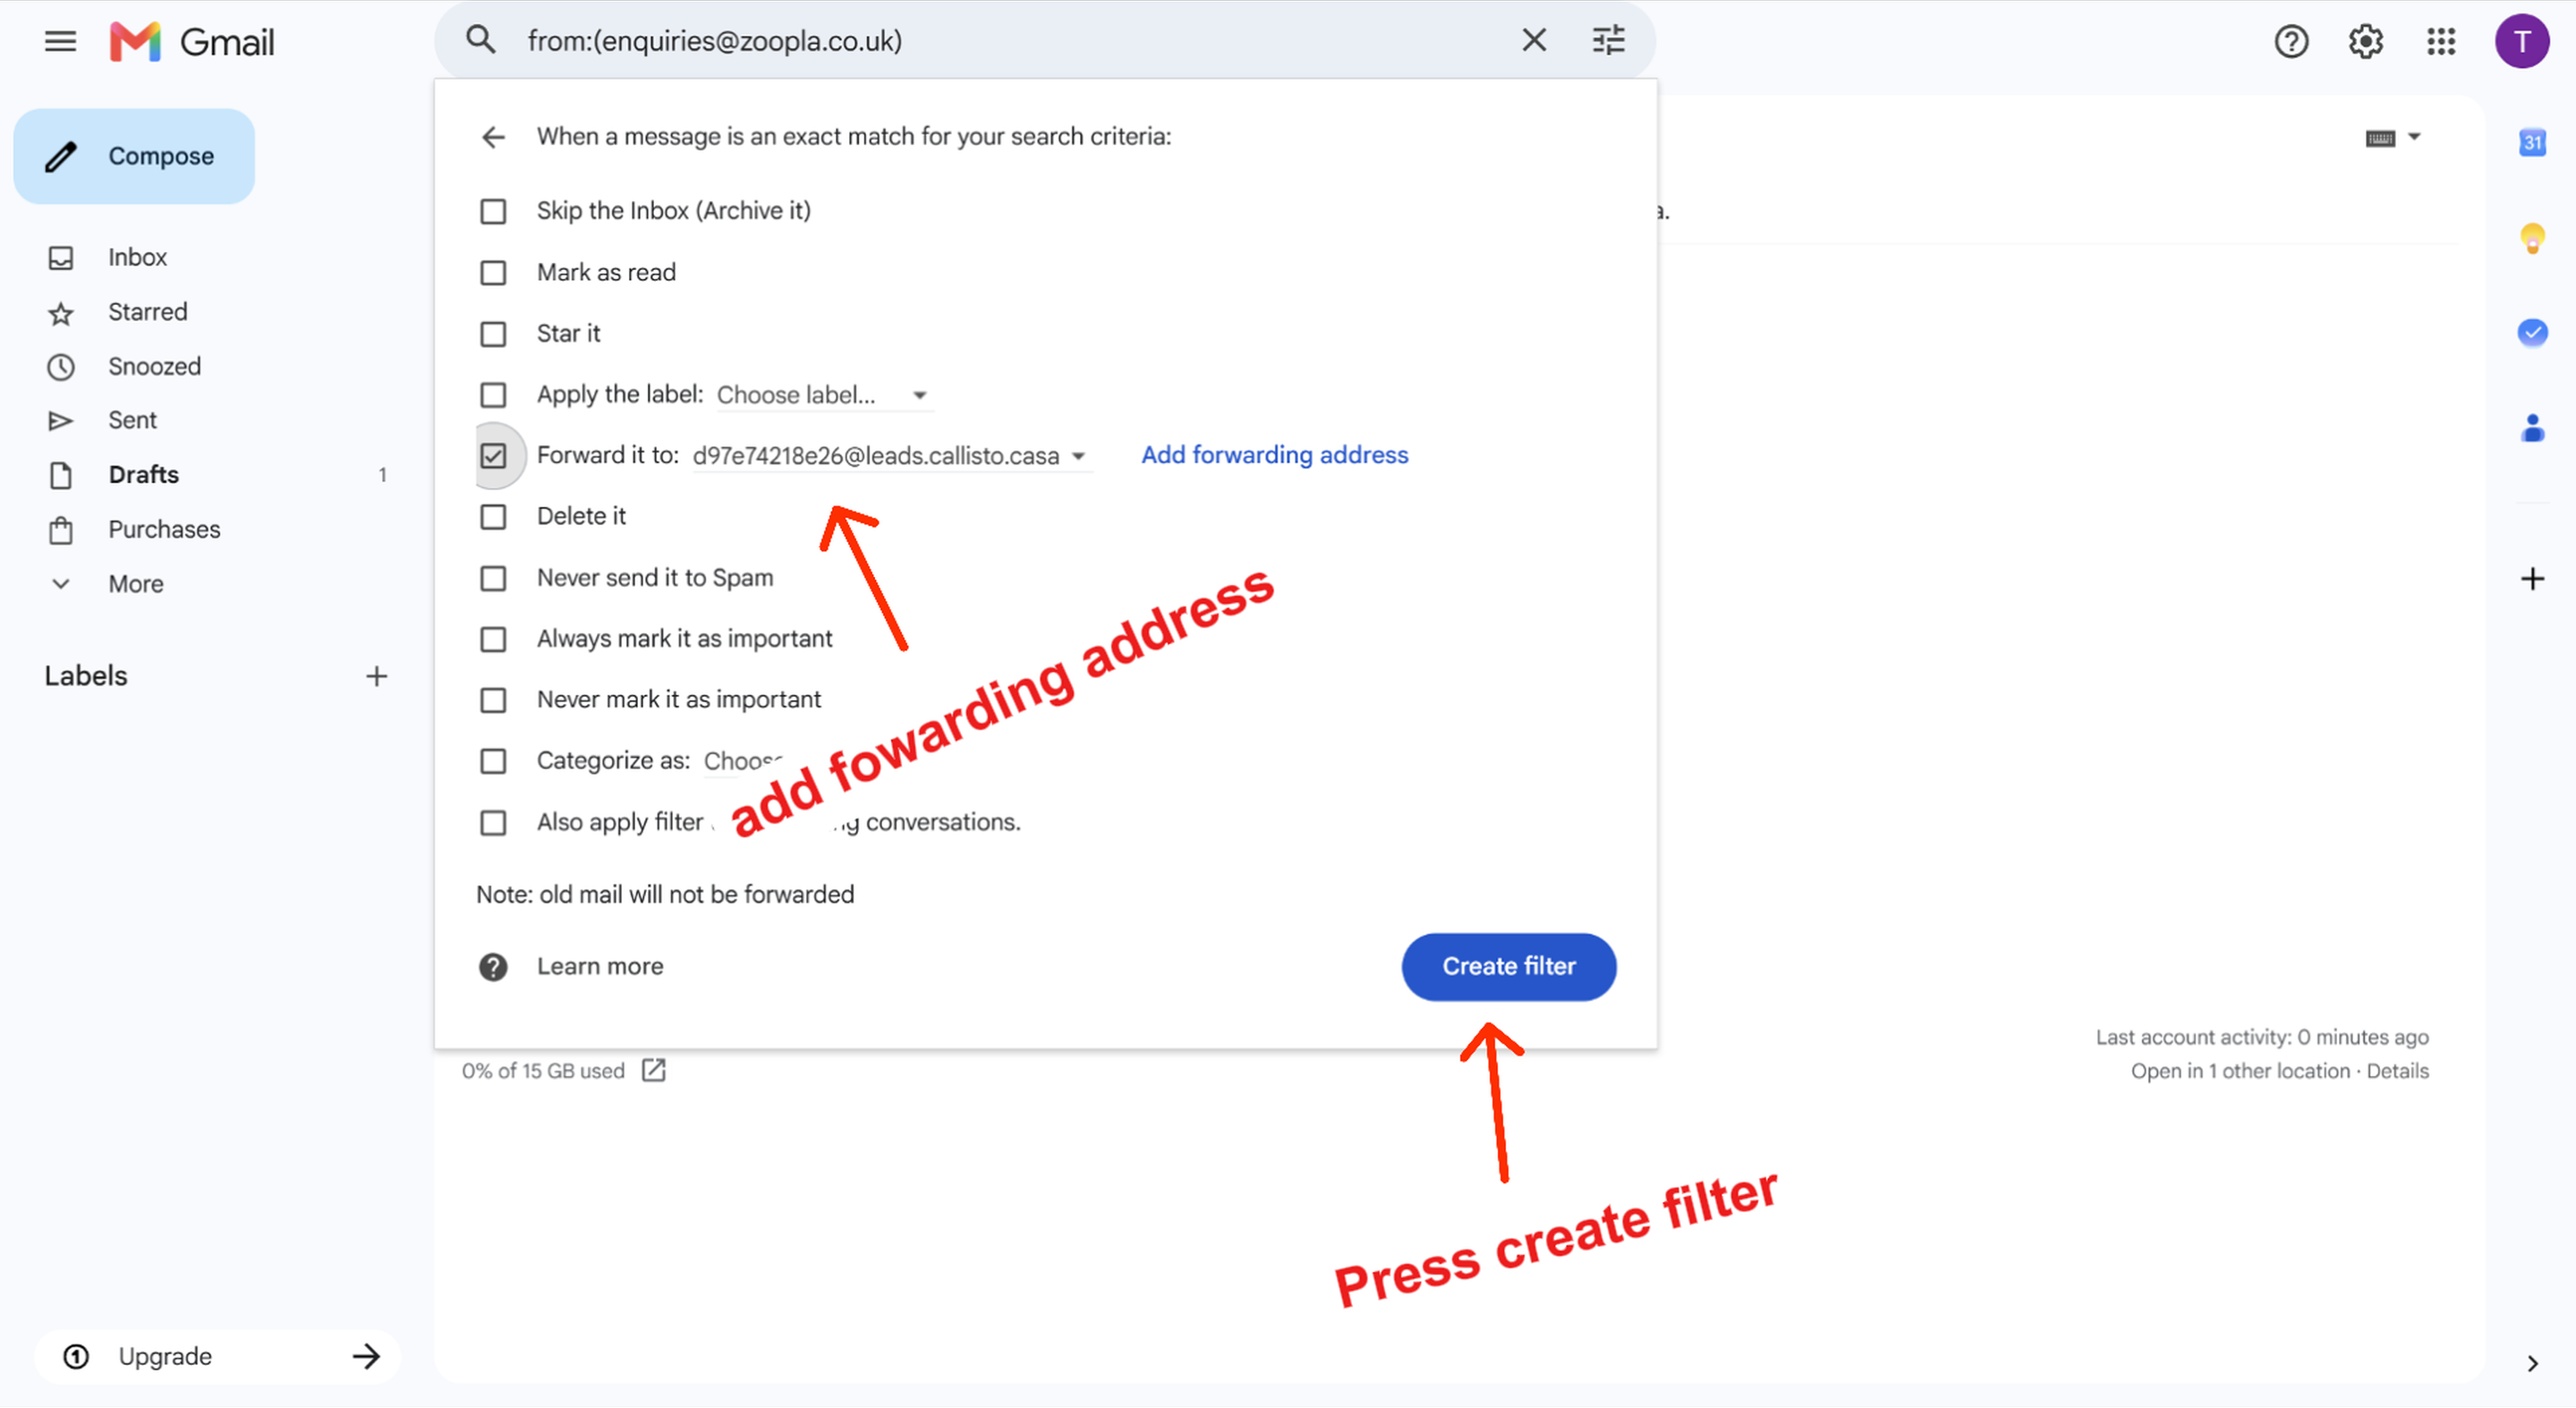
On the next screen, tick 'Forward it to' and select your Callisto forwarding address from the dropdown. Click 'Create filter' to save. From now on, every enquiry email from that portal will be forwarded to Callisto automatically.
Step 8 — Repeat for each portal
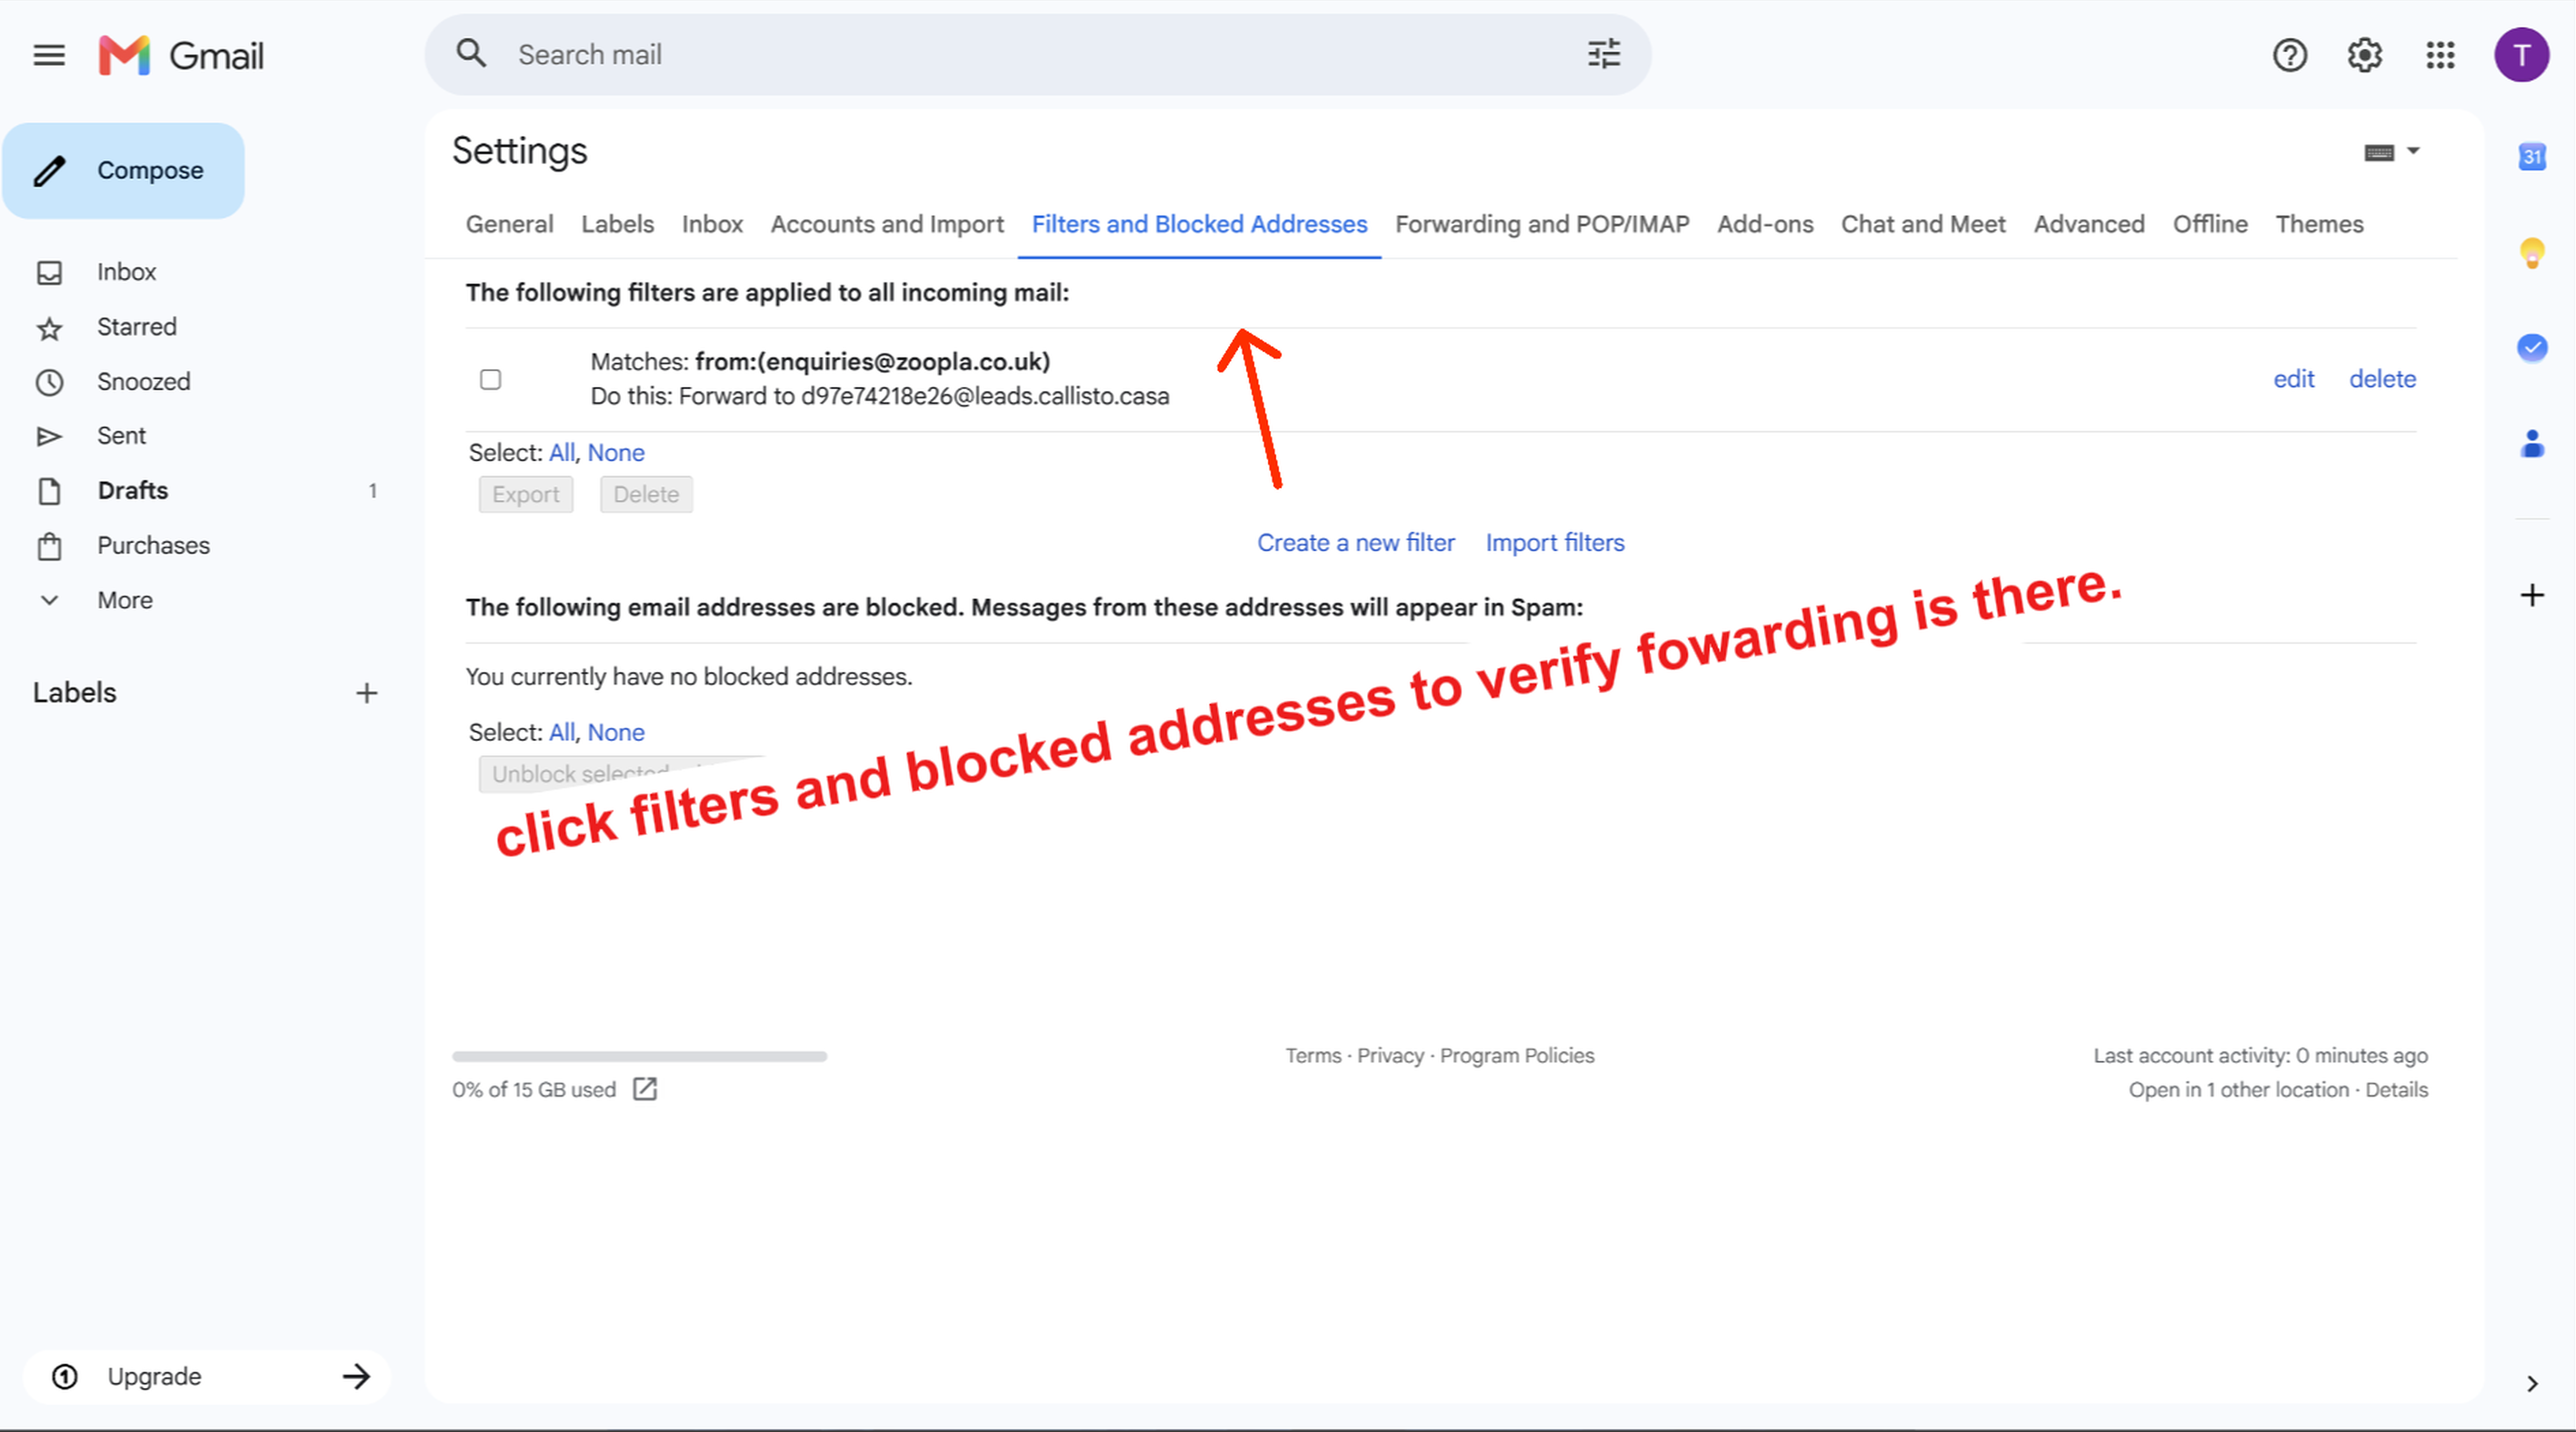
Go back to Callisto Settings and repeat steps 5–7 for each portal you use. You can verify your filters are active by going to Gmail Settings → Filters and Blocked Addresses — you should see one filter per portal, each forwarding to your Callisto address.
Testing the connection
Submit a test enquiry through one of the portals (or ask a colleague to). The lead should appear in your Callisto Leads page within 60 seconds and a call will be triggered automatically if AI calling is enabled.