How to set up Outlook forwarding
Forward your Rightmove, Zoopla and OnTheMarket enquiry emails to Callisto from Outlook.
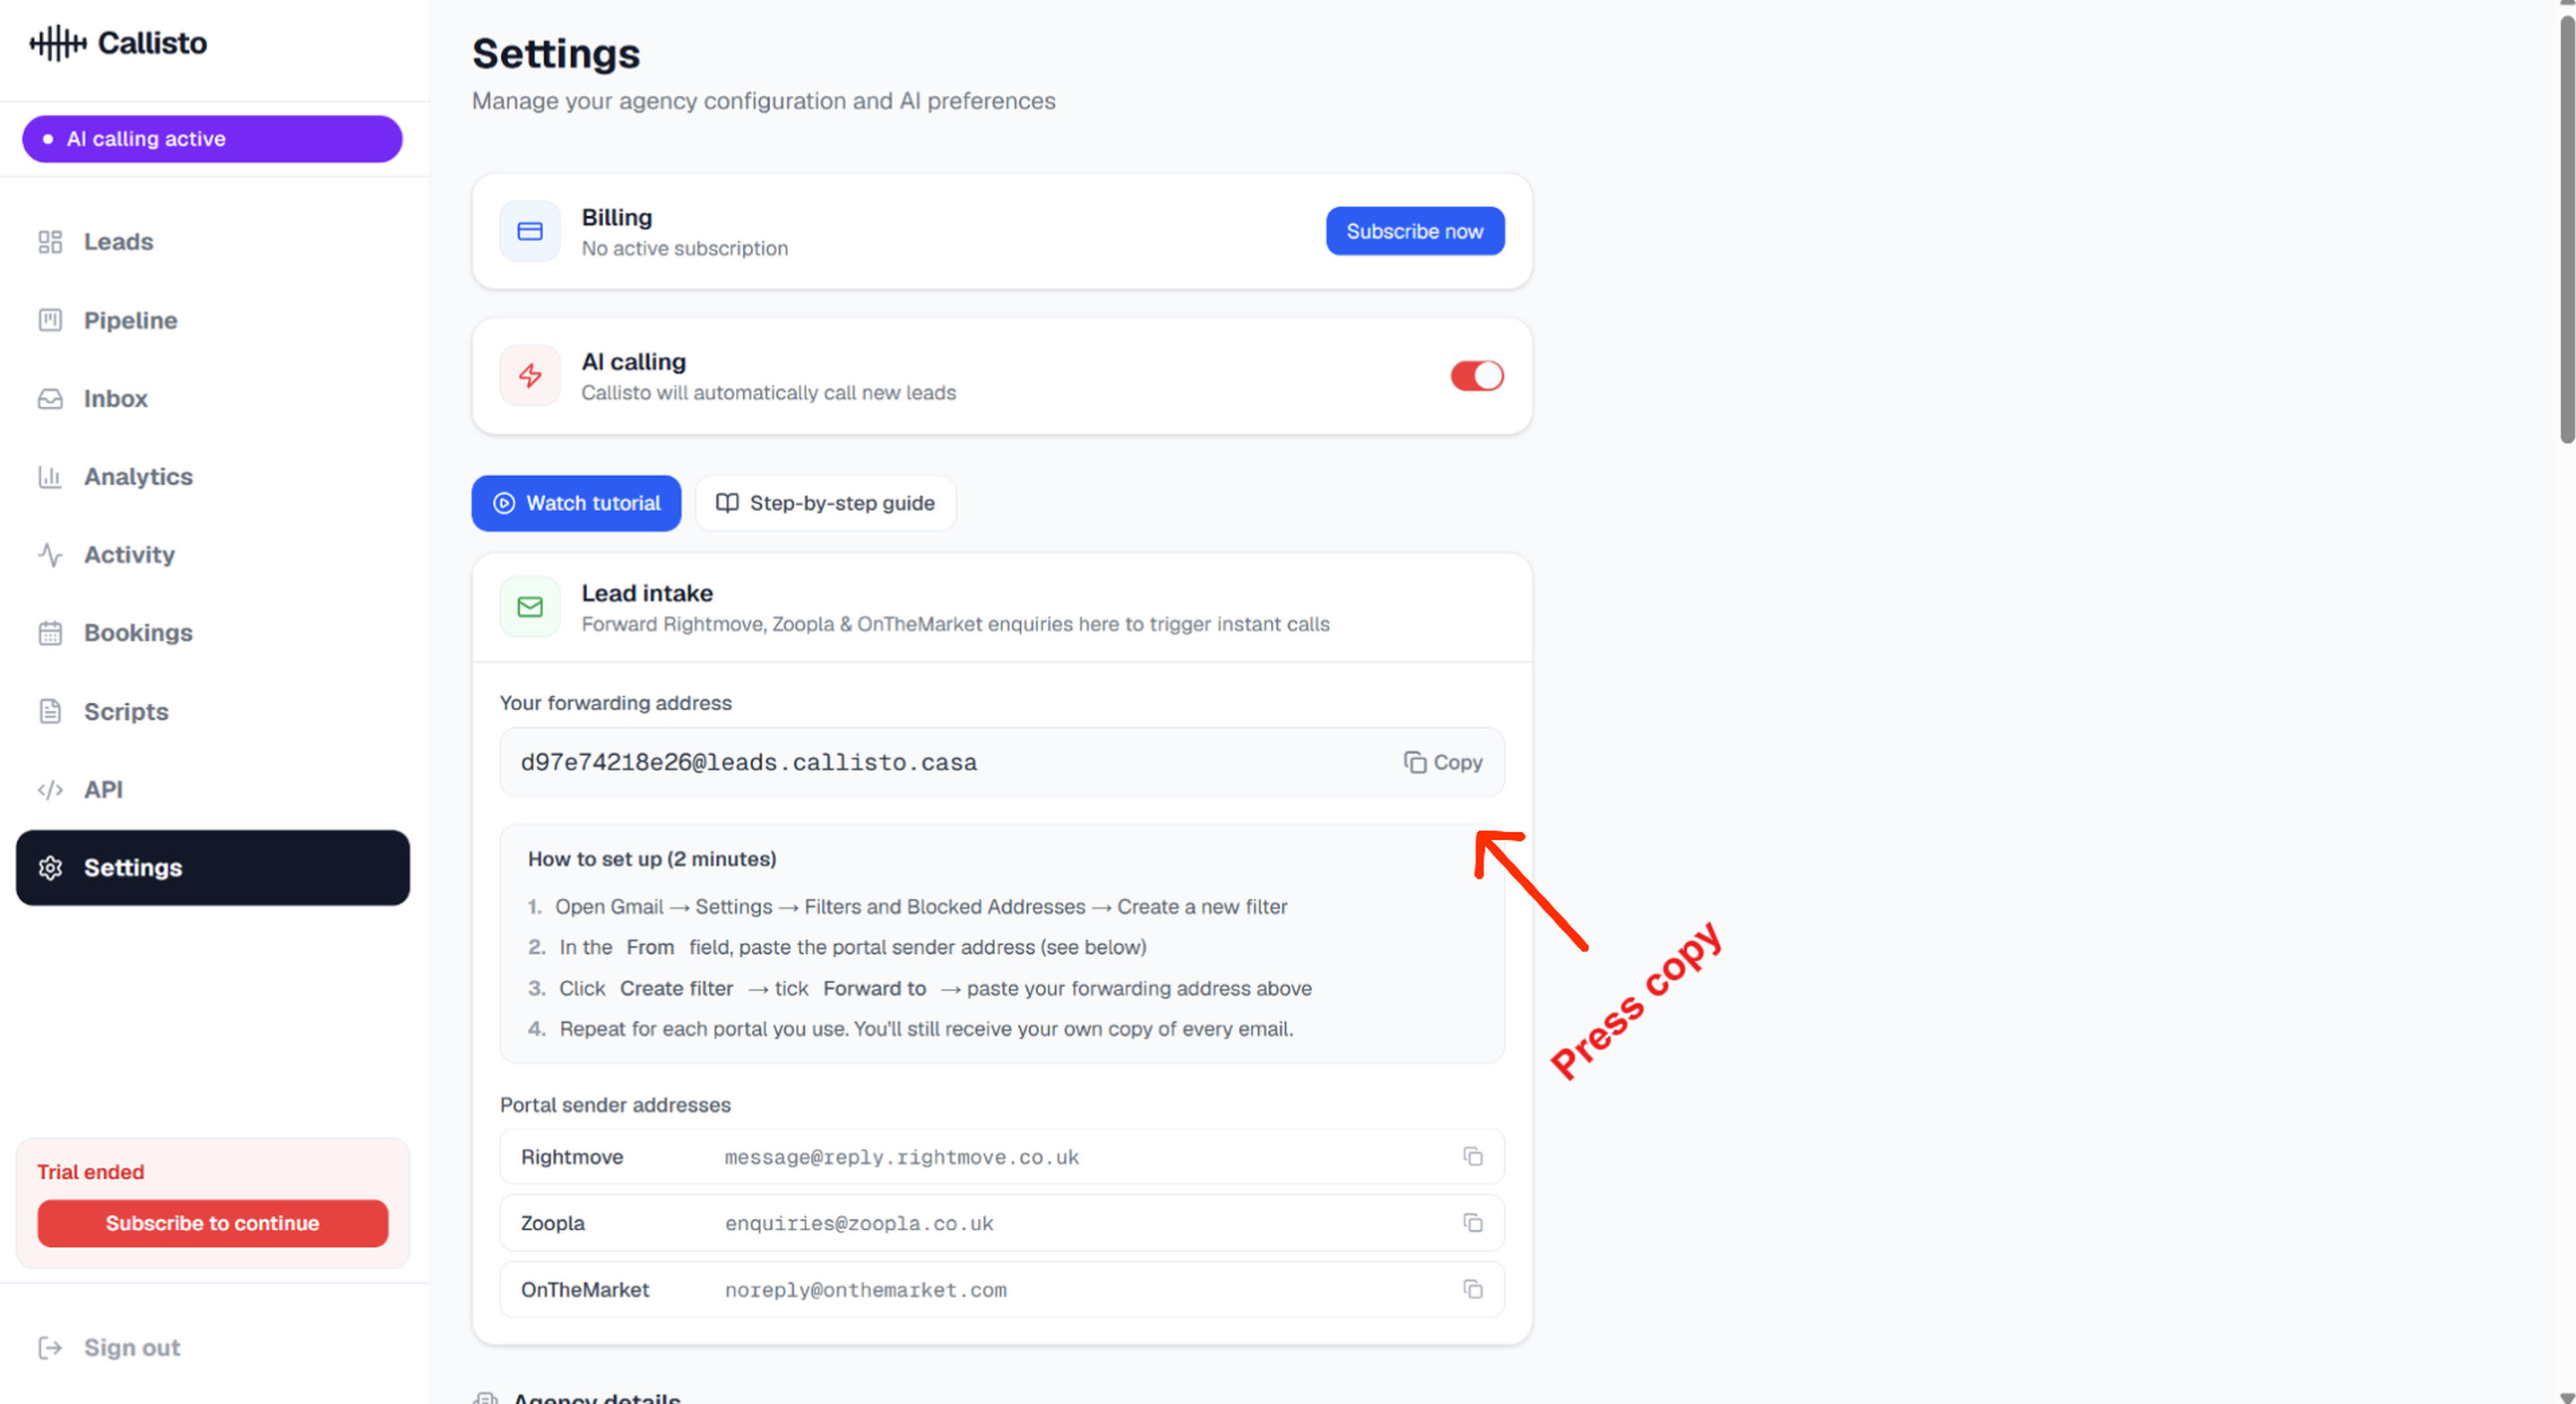
Step 1 — Copy your Callisto forwarding address
Open Callisto and go to Settings. In the Lead intake section you will see your unique forwarding address. Click the Copy button next to it.
Step 2 — Open Outlook Settings
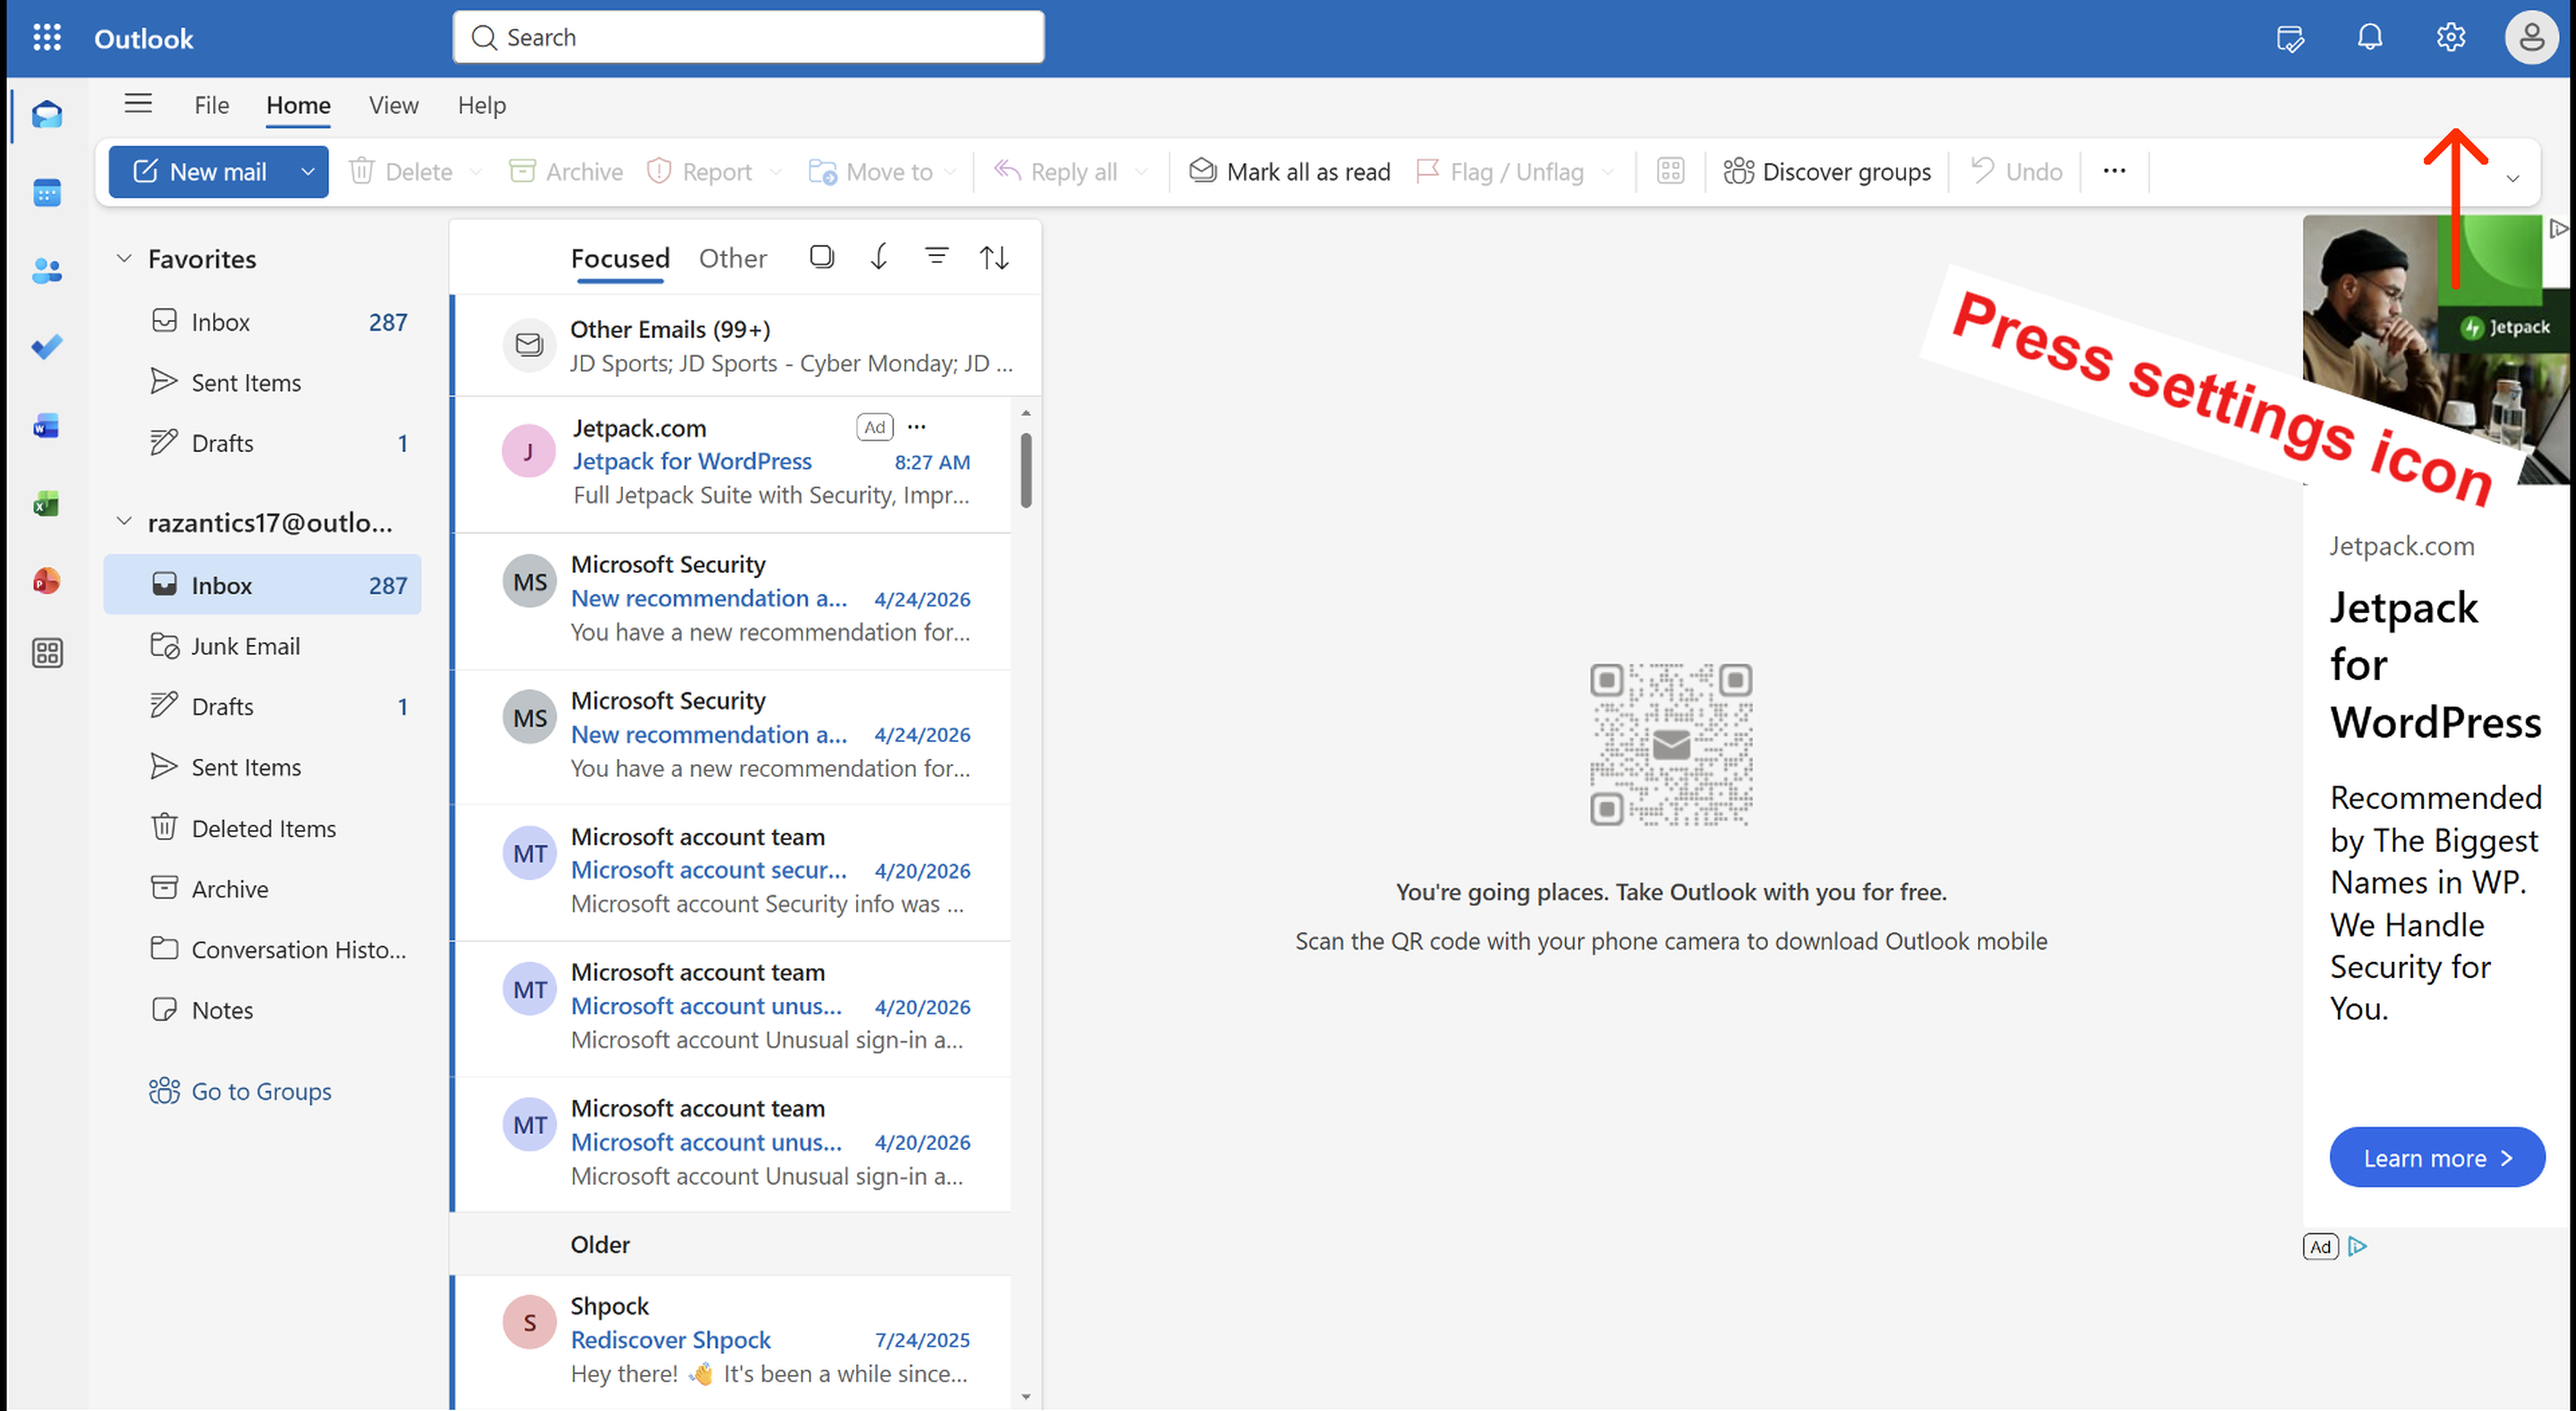
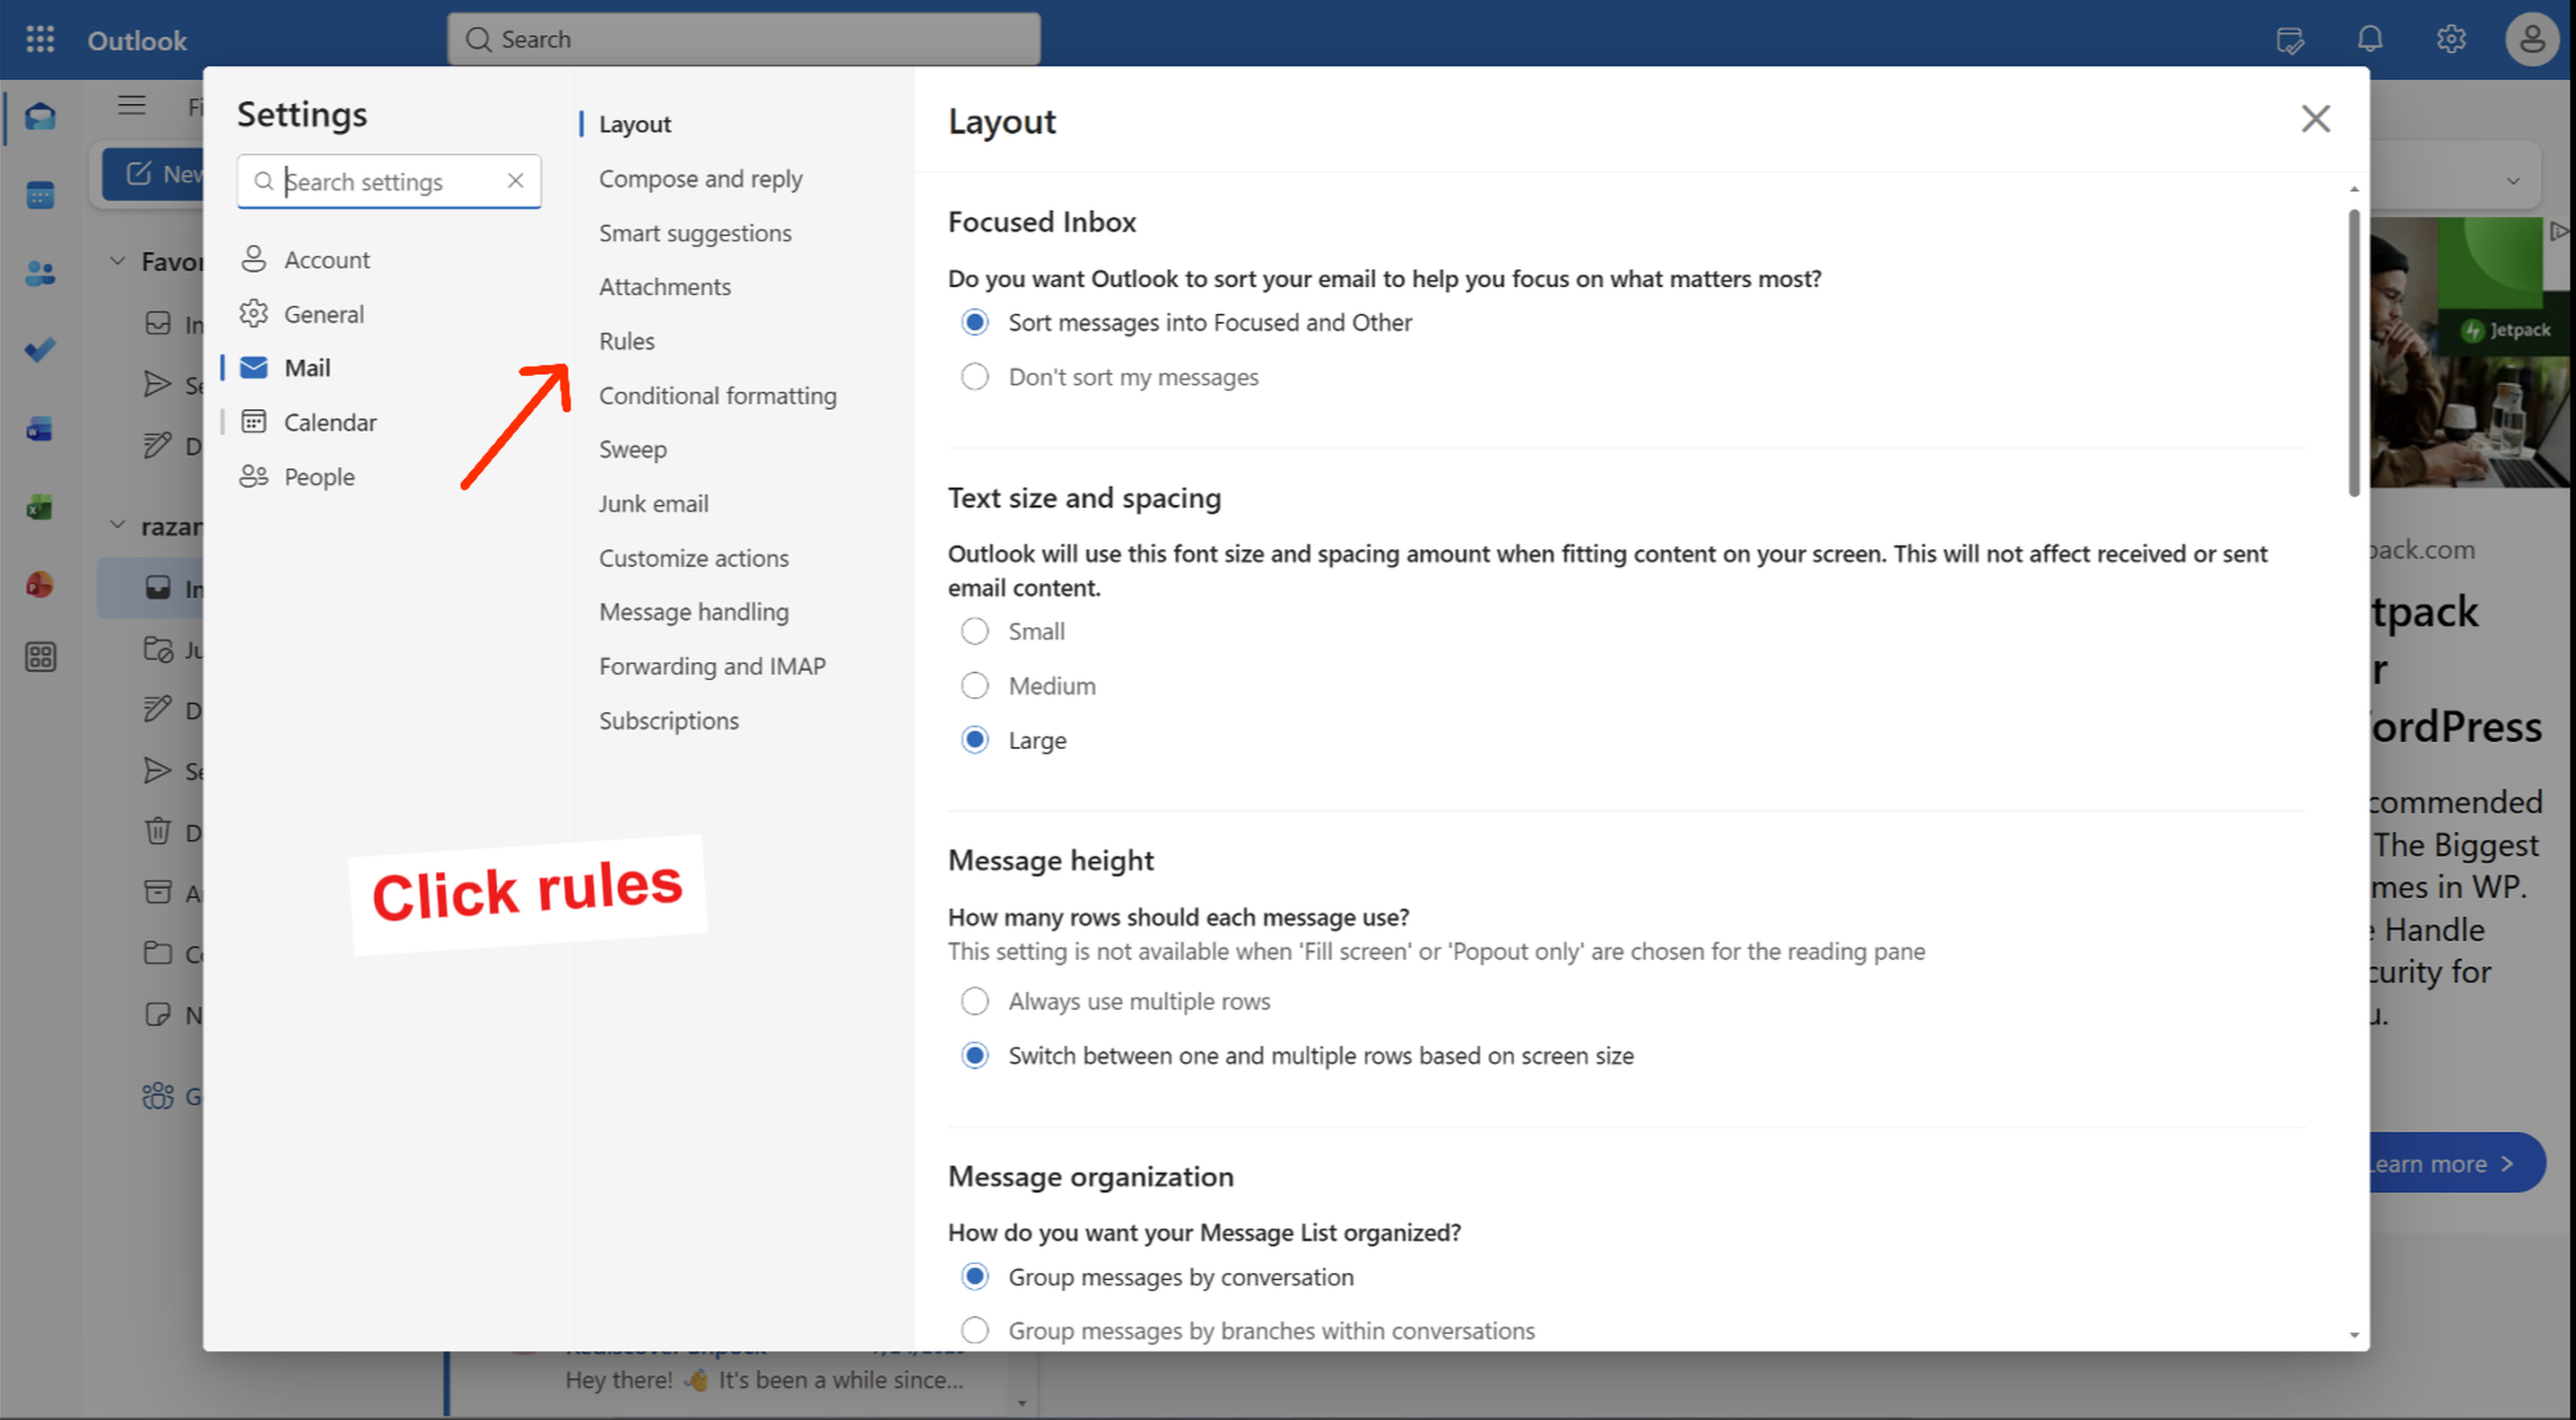
Go to Outlook on the web. Click the gear icon in the top-right corner to open Settings. In the left panel, click Mail → Rules.
Step 3 — Create a new rule
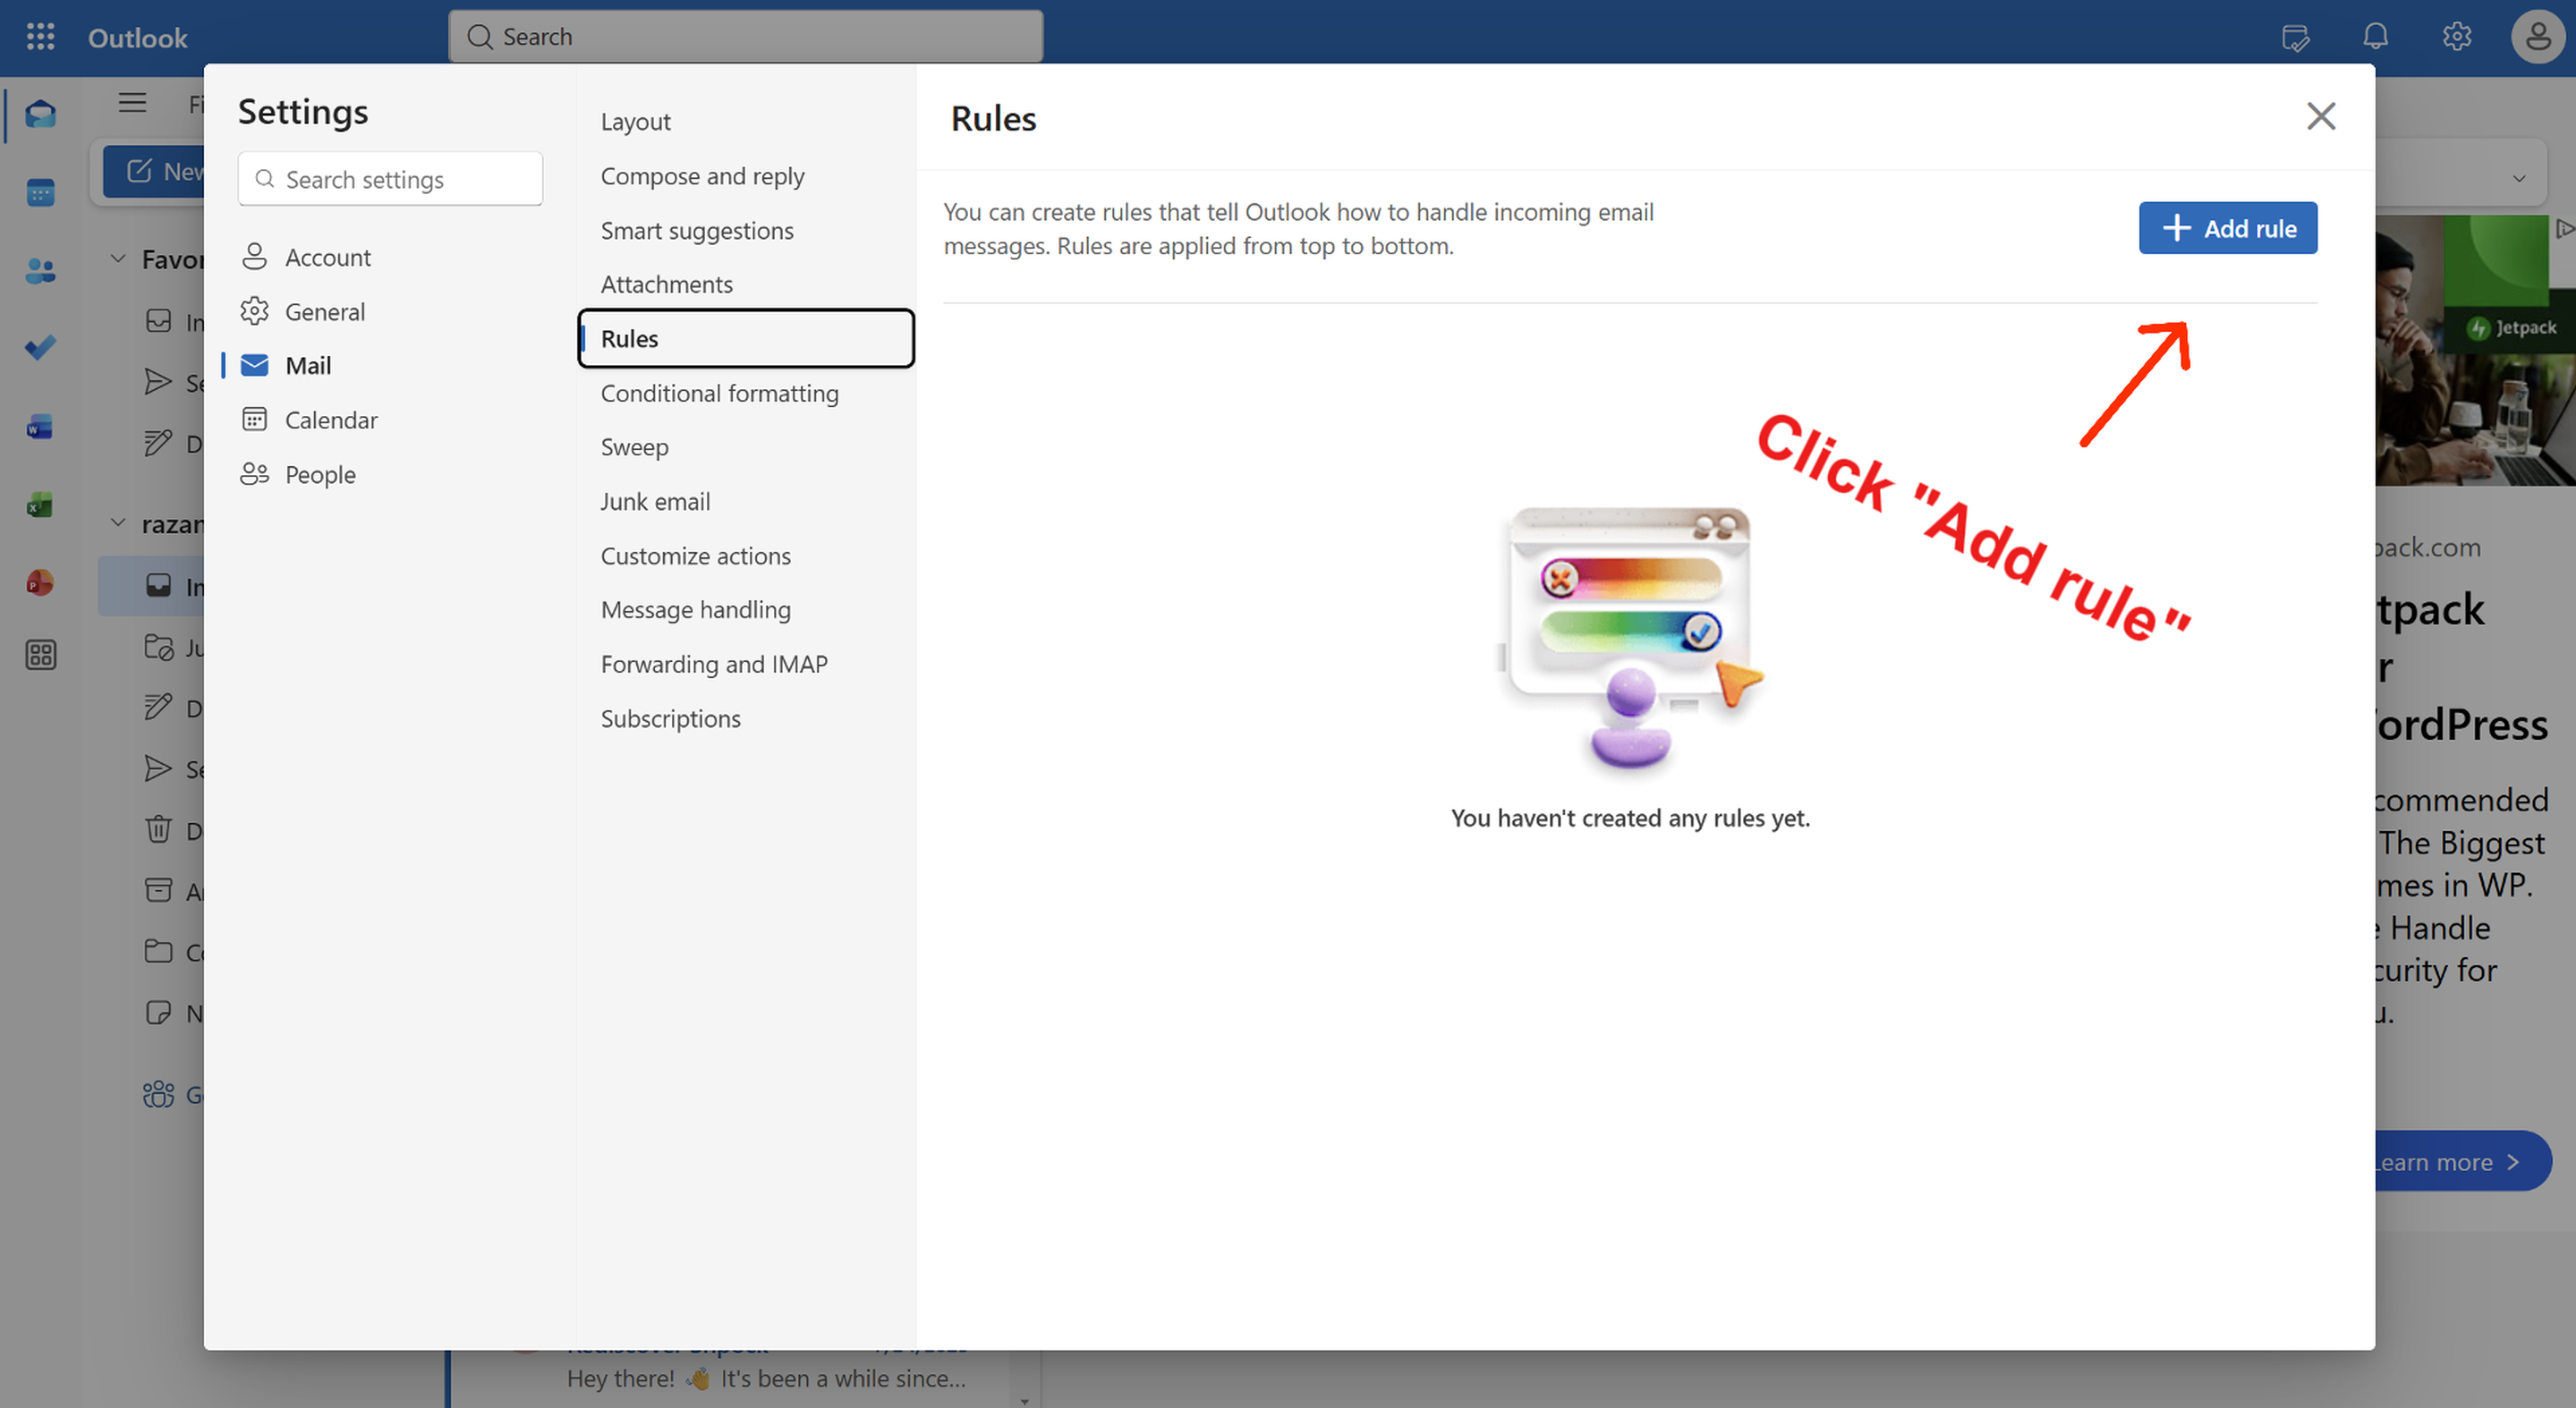
Click 'Add new rule'. A dialog appears with three fields: name, condition, and action.
Step 4 — Fill in the rule
Name the rule (e.g. 'Forward Zoopla to Callisto'). Under 'Add a condition', select 'From' and type the portal sender address — for example enquiries@zoopla.co.uk for Zoopla, message@reply.rightmove.co.uk for Rightmove, or noreply@onthemarket.com for OnTheMarket. Under 'Add an action', select 'Forward to' and paste your Callisto forwarding address.
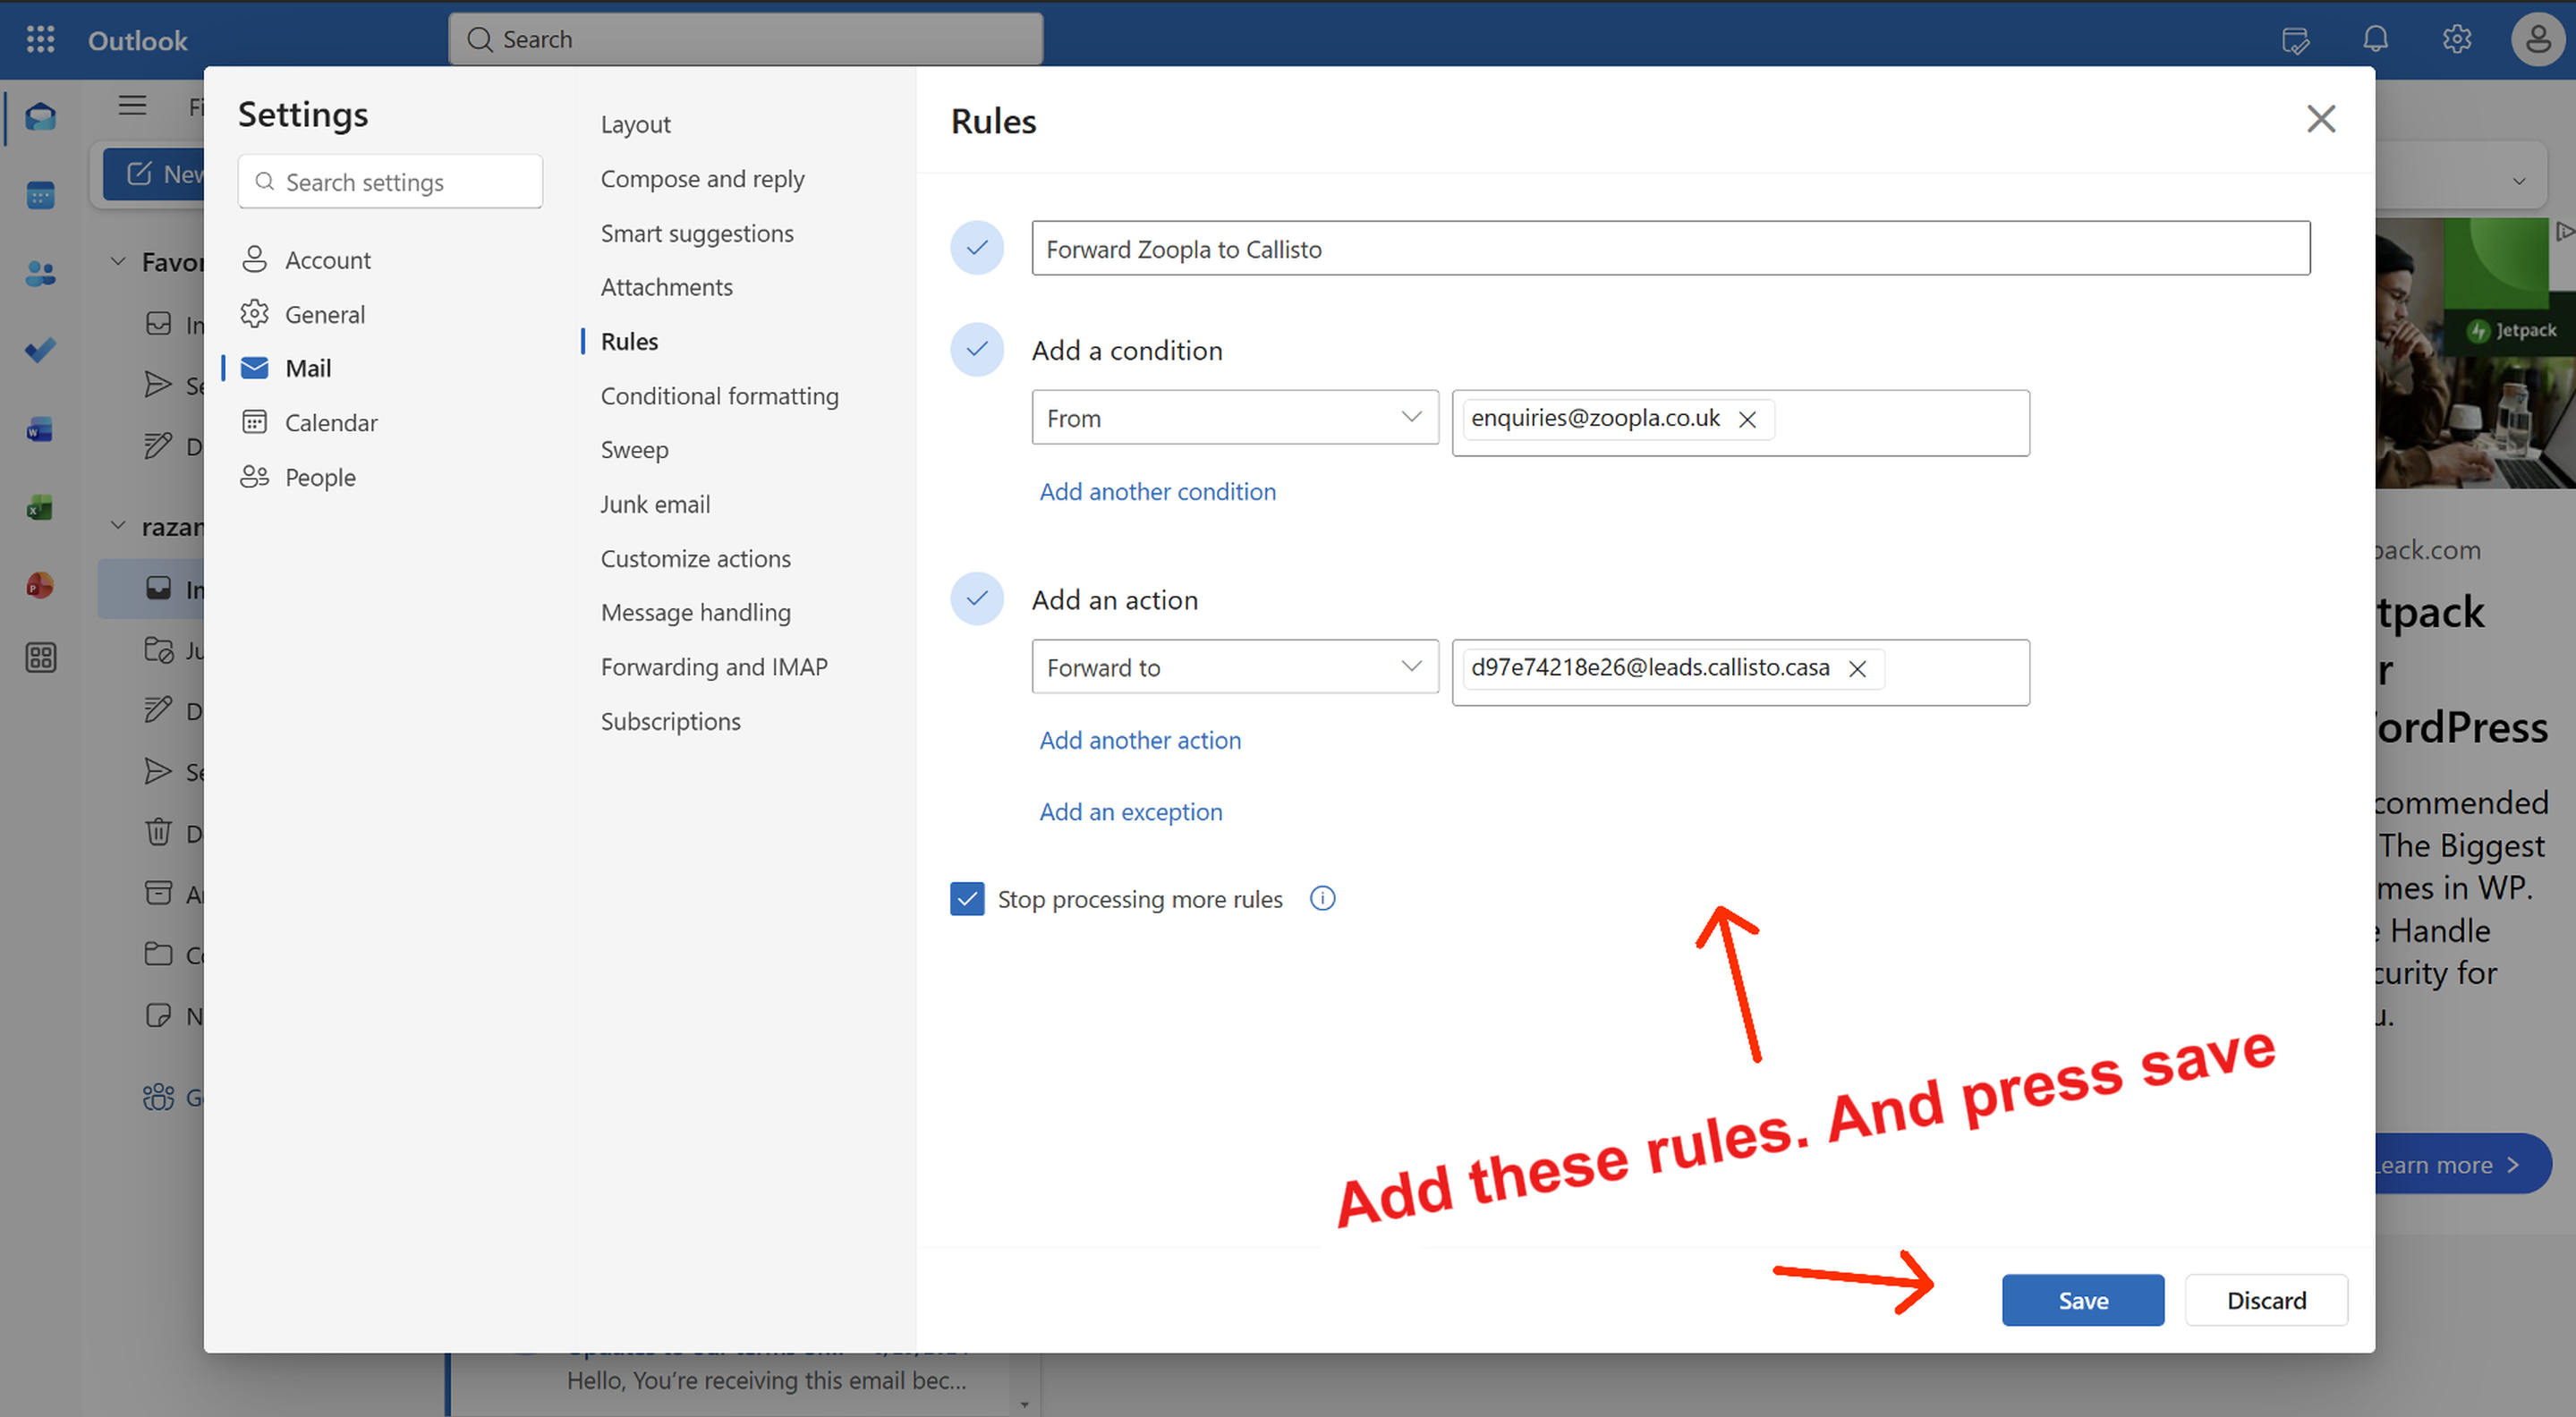
Step 5 — Verify your account and save
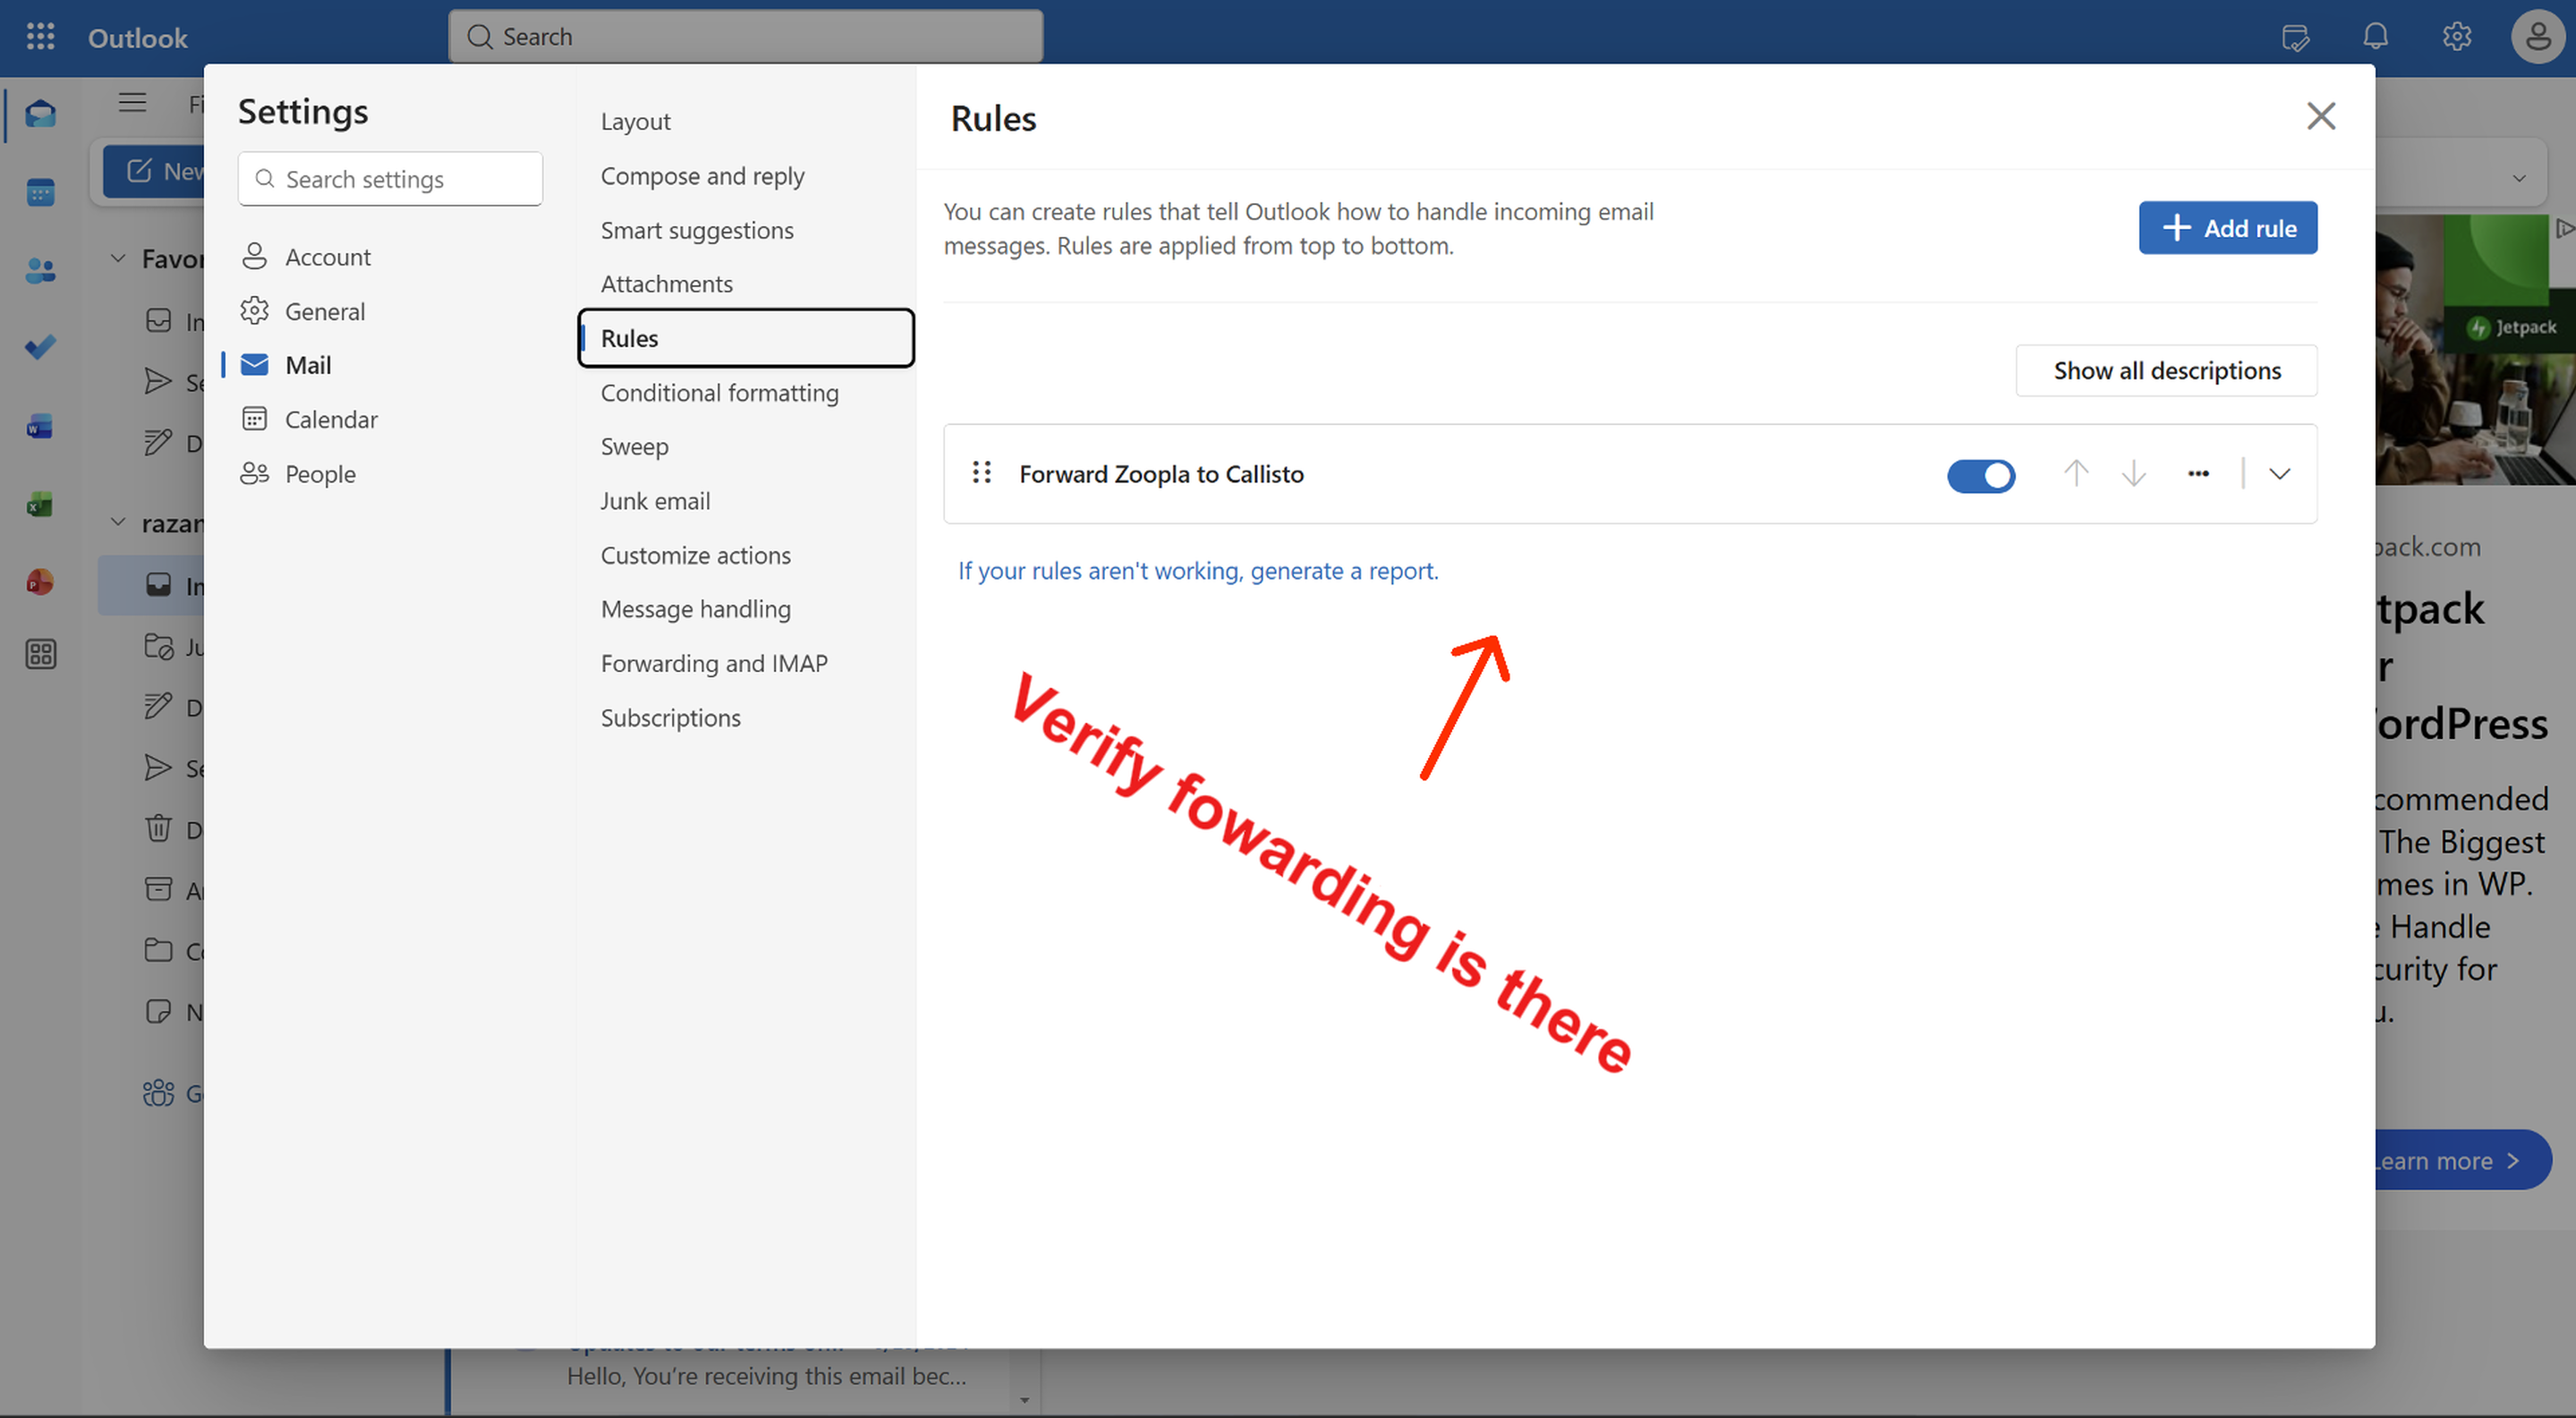
Outlook may show a 'Sign in and verify your account' prompt before allowing forwarding rules. Click Sign in and follow the verification steps. Then click Save to activate the rule.
Step 6 — Repeat for each portal
Repeat steps 3–5 for each portal you use. You should end up with one rule per portal, each forwarding to your Callisto address. Once set up, every new enquiry email will trigger an AI call within minutes.